

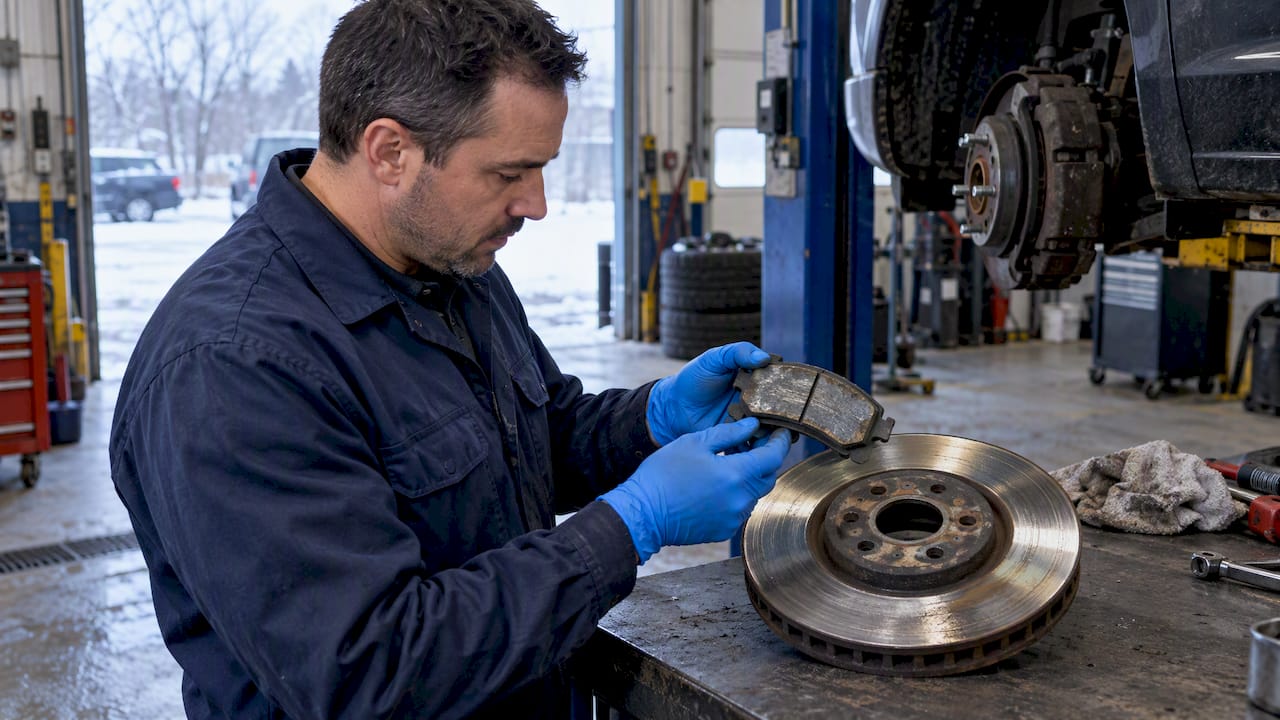
Brake pad glazing is a common winter problem, caused by overheating or dragging hardware that leaves a hardened, slick residue on the pad surface. If your pedal feels softer or your stops feel longer, check for dragging hardware or a stuck caliper first, and book a safety inspection if the symptoms persist.
TL;DR:
- Brake pad glazing in winter is mainly caused by repeated overheating, pad drag from seized hardware, and salt-induced corrosion that promotes uneven contact.
- Signs of glazing include shiny pad surfaces, uneven rotor discoloration, reduced pedal bite, longer stops, and squealing that returns after cooling.
- Proper deglazing involves sanding the pad surface, cleaning the rotor, and performing controlled bed-in stops in a safe environment; severe damage requires rotor replacement.
- Regular hardware maintenance, including rinsing, greasing slide pins, and replacing corroded components, significantly reduces the risk of glazing during winter.
- When pads measure below 3 mm or rotors show deep pitting or cracks, replacement is safer and more effective than attempting to deglaze.
Table of Contents
- What causes brake pad glazing in winter
- How to tell if your pads are glazed: quick signs and checks
- How to deglaze or repair glazed pads and rotors
- Preventing glazing in winter: a practical maintenance checklist
- When to replace pads and rotors instead of trying to deglaze
- Effects of cold temperatures on brake pad materials and performance
- Impact of winter driving conditions on brake pad glaze formation
- Differences between brake pad compounds for winter use
- Safety risks associated with glazed brake pads specifically in winter conditions
- Why seasonal brake care matters: an editorial view
- AAA Frictions winter-ready pads, matched rotors and kits
- Sources
- FAQ
What causes brake pad glazing in winter
Glazing happens when the friction material on a brake pad gets hot enough to melt its resin binder, which then cools into a hard, glass-like surface. That surface has a lower friction coefficient than properly bedded pad material, so the brakes grip less even though the pad looks intact.
A few conditions produce the heat that causes this:
- Repeated hard stops that push pad temperatures past their normal operating range.
- Pad drag from a stuck caliper piston or a seized slide pin, which keeps the pad in light contact with the rotor even when you’re not braking.
- Grit trapped between the pad and rotor, which creates small hot spots instead of even contact.
- A poor bedding-in process that leaves the friction layer uneven, so some areas overheat before others.
Winter adds its own accelerants. Road salt mixed with slush forms a gritty paste that works into the caliper and between the friction surfaces, and freeze and thaw cycles trap moisture against hardware that would otherwise stay dry. Frequent low-speed braking in slush also means the pads spend more time at partial contact, which is exactly the kind of low-grade, sustained heat that promotes glazing rather than a clean, controlled stop.
Transport Canada’s guidance on brake system maintenance makes a useful distinction here: a thin transfer film between pad and rotor is normal and necessary for braking to work at all. The problem is a film that forms from overheating or contamination rather than from the correct bedding process, and that distinction matters when you’re deciding whether to clean, deglaze, or replace.
How to tell if your pads are glazed: quick signs and checks
Glazed pads usually announce themselves before they fail outright, so a short inspection at home can tell you a lot.
- Look at the pad face. A properly worn pad has a dull, slightly matte surface; a glazed one looks shiny or almost polished, sometimes with a bluish tint.
- Check the rotor for an uneven transfer film or discoloured patches, which often line up with where the pad has been dragging.
- Press the brake pedal and note the bite. A weaker initial grab, a longer stopping distance, or a pedal that feels firm but doesn’t slow the car as expected are all signs the friction surface isn’t doing its job.
- Listen for squeal that changes with temperature, fading after a few hard stops but returning once the brakes cool.
- With the wheel off the ground, spin it by hand. Noticeable drag or resistance points to a sticking caliper or pin rather than glazing alone.
If the pad thickness still measures comfortably above the wear limit and the rotor looks clean, deglazing at home is usually a reasonable first step. If you find a seized pin, a rotor with deep pitting, or uneven wear across the pad, that’s a sign to get a professional look before you drive much further.
How to deglaze or repair glazed pads and rotors
Before touching any brake component, set the parking brake, use wheel chocks, and support the vehicle on jack stands rated for the weight, never a jack alone. Wear gloves and eye protection, since brake dust and old pad material shouldn’t be inhaled or handled bare-handed.
- Remove the wheel and the caliper, following the torque specifications for your vehicle when you reinstall anything.
- Take out the pads and lightly sand the friction face with medium-grit sandpaper, just enough to remove the glossy layer and expose fresh material underneath.
- Clean the rotor surface with brake cleaner or acetone to remove any oily residue, then wipe it down with a lint-free cloth.
- Reinstall the pads and calipers, then bed them in with a controlled heat cycle: find a safe, empty stretch of road and perform a series of progressive stops from moderate speed, letting the brakes cool between each one rather than riding them.
- Recheck pedal feel and stopping performance once the brakes have cooled fully.
Pro Tip: Do your bed-in cycle on a quiet road with no traffic behind you, since the first few stops will feel noticeably weaker than normal.
Rotors are a separate judgment call. Light surface glazing or minor discolouration can often be resolved with resurfacing at a shop, but a rotor with deep pitting, blue heat spotting, or thickness below the minimum stamped on the rotor itself should be replaced rather than machined. One Mississauga-area shop’s guidance on winter salt damage notes that when corrosion has already removed metal beneath the surface, machining won’t restore safe thickness or heat dissipation. Hand the job to a professional if you find a seized caliper, rotor damage beyond light pitting, or any sign that brake fluid has overheated, since those point to problems that go well past a pad issue.
Preventing glazing in winter: a practical maintenance checklist

Most winter glazing traces back to one chain of events: salt crust builds up, slide pins corrode and seize, the pad drags against the rotor, and that constant low-grade contact overheats the friction surface. Hardware corrosion from road salt can outpace five years of wear in a salt-free climate within a single winter, which is why hardware care matters as much as the pads themselves.
A seasonal routine keeps this cycle from starting:
- Rinse the undercarriage regularly during salt season, ideally every two to three weeks, to stop brine from baking onto hardware.
- Clean caliper brackets and slide pins at the fall tire swap, and regrease them with a silicone-based caliper grease rather than a standard multipurpose grease.
- Replace abutment clips, pin boots, or full hardware kits when they show rust or stiffness rather than waiting for them to fail.
- Inspect pad thickness and rotor condition each spring, and plan replacement before pads drop to 3 mm.
- Avoid riding the brakes on long descents. Downshifting and spacing out your braking lets the pads cool between applications instead of staying hot the whole way down.
A full hardware service for one axle typically costs around $15 to $25 in parts and can be done in under an hour, which is a modest investment against the cost of a seized caliper or a glazed rotor later in the season, according to Canadian winter brake maintenance guidance.
| Service | When to do it | Why it matters |
|---|---|---|
| Undercarriage rinse | Every 2 to 3 weeks during salt season | Prevents brine from baking onto calipers and pins |
| Slide pin regrease | At fall tire swap | Stops pins from seizing, which causes pad drag |
| Hardware kit replacement | Every two years in heavy-salt regions, or sooner if corroded | Keeps pads seated evenly and prevents uneven wear |
| Spring brake inspection | Within two weeks of the last salt application | Catches pitting or thinning rotors before they fail |
For step-by-step cleaning timing and non-acid products that won’t harm wheel coatings, this partner guide on removing brake dust safely covers dwell times that work well alongside a winter rinse schedule. Our own guidance on matching pads, rotors, and hardware for winter driving goes into more detail on building a complete seasonal setup.
When to replace pads and rotors instead of trying to deglaze
Deglazing only makes sense when the pad has enough material left to work with and the rotor underneath is in reasonable shape. Past certain thresholds, repair stops being the safer option.
- Replace pads once thickness measures below 3 mm, checked with a ruler or a dedicated brake pad gauge rather than by eye.
- Replace rotors showing deep pitting, visible heat cracks, blue heat spotting, or scoring deeper than a shop’s machining limit allows.
- Replace rotors that measure below the minimum thickness stamped on the hub or edge, since a thin rotor can’t dissipate heat properly even with fresh pads.
Delaying replacement past these points risks a sudden loss of stopping power rather than a gradual one, which is the more dangerous failure mode in winter traffic. A hardware kit runs a fraction of the cost of a full axle job, so addressing corrosion early is almost always the cheaper and safer route.
Effects of cold temperatures on brake pad materials and performance
Cold weather changes how friction material behaves before it ever gets hot enough to glaze. Most pad compounds need to reach a working temperature band before they deliver their full friction coefficient, and a cold start means the first few stops of a drive can feel noticeably weaker than once the brakes have warmed up.
Resin binders in pad material also stiffen slightly in sustained cold, which can change how evenly the pad seats against the rotor during that initial contact. That uneven seating is part of why a cold morning commute sometimes produces a soft pedal that firms up a few kilometres in.
The flip side matters just as much. A pad that performs well when cold but overheats quickly once warm is a poor match for winter driving, where stop-and-go traffic and slush create frequent low-speed braking that keeps temperatures elevated longer than dry summer driving would. The ideal winter pad holds a workable friction coefficient across a wide temperature band, rather than performing well only at one end of it.
Impact of winter driving conditions on brake pad glaze formation
Winter driving rarely produces the single hard stop that glazes a pad instantly. It’s the accumulation of small, repeated events that does it. Stop-and-go traffic in slush means pads spend more time in light, sustained contact with the rotor rather than a brief, firm application, and that kind of low-grade heat is exactly what promotes a hardened friction layer over time.
Road salt and grit compound the problem by working into the space between pad and rotor, creating localized friction points that run hotter than the rest of the surface. Combined with a slide pin that’s starting to stiffen from corrosion, even normal winter braking can produce the kind of uneven, sustained heat that glazes a pad well before it’s worn out.
Short trips make this worse. A vehicle that never gets fully up to temperature, then sits in cold and damp conditions overnight, gives corrosion more opportunities to take hold between drives. The result is a slow build toward glazing that often goes unnoticed until stopping performance has already dropped.
Differences between brake pad compounds for winter use
Brake pads generally fall into ceramic, semi-metallic, and organic compound families, and they don’t all respond to winter conditions the same way. Ceramic compounds tend to produce less dust and wear more predictably across a range of temperatures, which makes them a common choice for everyday winter driving. Semi-metallic pads often provide strong bite at higher temperatures but can take longer to reach their effective friction coefficient when cold, which matters on the first stops of a winter morning.

Moisture handling is the other piece that matters specifically in winter. A compound that clears water and slush quickly from the friction surface restores full braking sooner after driving through slush or a puddle, compared to one that holds moisture against the pad face. Some advanced ceramic technologies are designed to clear moisture rapidly and maintain a consistent friction coefficient across rain, snow, and humidity rather than only in dry conditions. That kind of climate-adaptive design addresses a gap that standard ceramic pads can leave open when conditions shift quickly from dry to wet or snowy.
Safety risks associated with glazed brake pads specifically in winter conditions
Glazed pads are a safety problem in any season, but winter conditions make the consequences worse. A reduced friction coefficient means longer stopping distances, and on a road that’s already slick with snow or ice, that extra distance can be the difference between stopping in time and not.
Glazing rarely happens evenly across all four wheels, which means the vehicle can pull to one side under braking or distribute weight unpredictably during a hard stop. Combined with reduced traction from winter road surfaces, that uneven braking response increases the risk of a skid or a loss of control, particularly in an emergency stop.
There’s also a feedback problem. A driver who doesn’t recognize the signs of glazing, a softer pedal, a longer stop, a squeal that fades, may not realize their margin for error has shrunk until they need the full stopping distance and don’t have it. That’s part of why Transport Canada’s guidance stresses functional hardware and regular inspection: catching drag or corrosion early prevents the kind of overheating that leads to this reduced margin in the first place. For drivers navigating winter commutes, a quick inspection after a caliper sticking episode, covered in our guide to diagnosing caliper sticking in winter, is a reasonable habit to build into the season.
Why seasonal brake care matters: an editorial view
Most winter brake glazing is preventable, and that’s the part owners tend to miss. It isn’t bad luck or an inevitable side effect of cold weather. It’s almost always a hardware problem that got ignored: a slide pin that stiffened, a boot that let in moisture, a clip that rusted and let the pad sit unevenly. Brake pad technology has made real progress on moisture handling, HydroAdaptive designs are one example of engineering specifically for the gap between dry-weather performance and wet or cold conditions, but no pad compound can compensate for a caliper that won’t release properly. The maintenance habit matters more than the product choice.
— AAA
AAA Frictions winter-ready pads, matched rotors and kits
If your inspection points to pads or rotors that are past saving, replacing them with winter-minded components is a straightforward way to close the gap glazing leaves behind. Some brake pads and rotors use ceramic technology designed to clear moisture quickly and hold a consistent friction coefficient through rain, snow, and humidity rather than just in dry conditions.

- Type 03 Brake Pads offer a HydroAdaptive ceramic compound suited to everyday winter driving.
- Type 07 Brake Pads provide an alternative compound for different fitments and driving styles.
- SC Type Rotors and GC Type Rotors pair with either pad line to address pitting and heat spotting from salt exposure.
If you’re not sure which combination fits your vehicle, our guide on which brake pads to choose walks through the fitment and compound questions before you order.
Sources
- Remove Road Salt: 5 Proven Tips Top Canadian Owners Swear By — RIDEZ
- Is Winter Salt Bad for Your Brakes? Why Every Driver Needs a Spring Brake Inspection in Mississauga
- Transport Canada technical guidance (agency document)
FAQ
Why do my brake pads keep glazing?
Repeated glazing usually points to a mechanical cause rather than bad luck, most often a dragging caliper or a seized slide pin that keeps the pad in light, constant contact with the rotor. Checking and regreasing hardware, especially after winter salt exposure, typically resolves the pattern.
How do you deglaze brake pads?
Remove the wheel and caliper, lightly sand the glossy pad surface to expose fresh friction material, clean the rotor with brake cleaner, then reinstall and perform a series of progressive bed-in stops on a safe road. Let the brakes cool between stops and recheck pedal feel once finished.
Will glazed brake pads fix themselves?
No. Glazing is a hardened surface change in the friction material, and it won’t wear away or correct itself through normal driving. It needs either a deliberate deglazing process or pad replacement if the glazing is severe or paired with uneven wear.
How to tell if brake pads are glazed over?
Look for a shiny or glass-like pad surface, a weaker brake bite, longer stopping distances, or squealing that fades as the brakes warm up. Spinning the wheel by hand to check for drag and comparing pad thickness against the wear limit can confirm whether glazing or a hardware issue is the cause.