

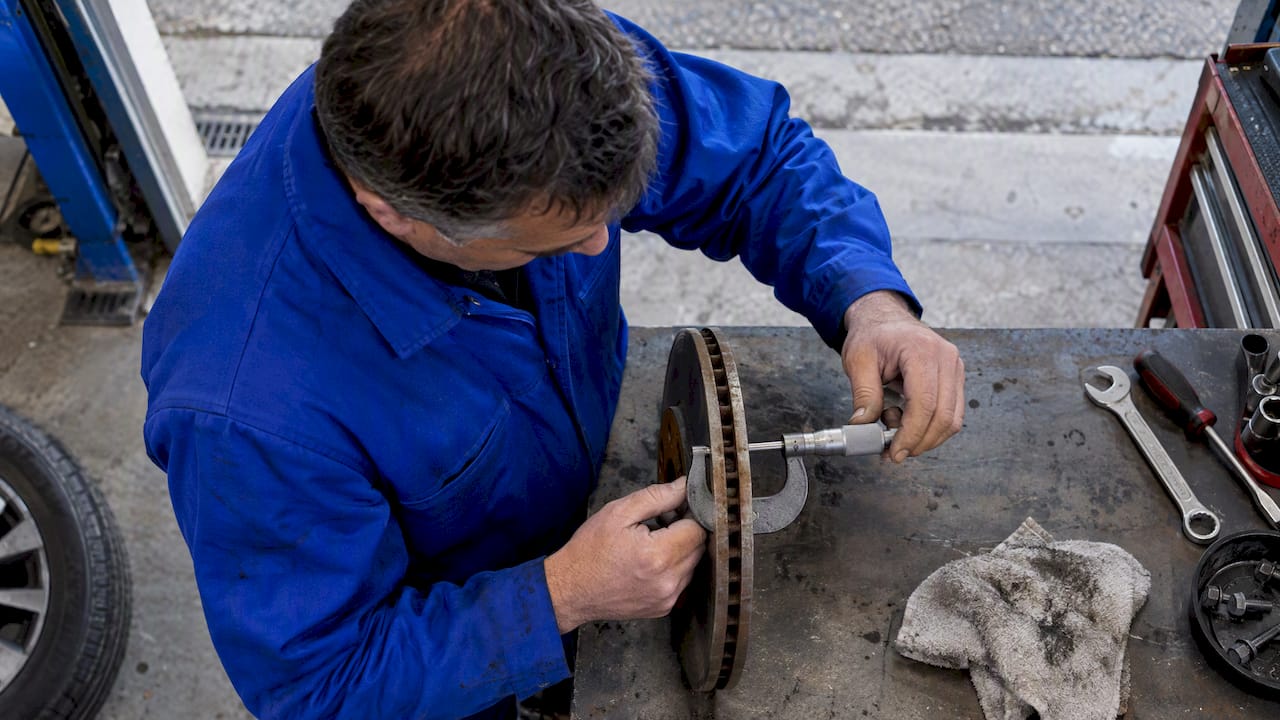
Rotor thickness variation, usually called disc thickness variation or DTV, is the difference between the thickest and thinnest points on a rotor’s friction surface. It is the most common reason a brake pedal pulsates or a steering wheel shudders under braking. You find it with a micrometer, not a caliper, by measuring at eight points around the rotor. If the spread is beyond specification, the rotor is replaced or correctly resurfaced, and the cause is fixed before new parts go on.
This guide is written for drivers who do their own brake work and for technicians who want a clean, repeatable procedure. We cover what DTV is, why it develops, how to measure it, what the numbers mean and how to stop it coming back.
TL;DR
- DTV is the gap between the thickest and thinnest spots on the rotor face. It is measured with a micrometer at 8 equal points, not with a caliper.
- Pedal pulsation is rarely a “warped rotor”. It is almost always DTV pushing back through the brake fluid.
- A rotor can sit well above its minimum thickness and still fail because of DTV, so check both.
- Hub runout, uncleaned mounting surfaces, uneven lug nut torque and heavy heat are the usual causes.
- Replacing pads alone on a rotor with DTV brings the vibration straight back.
Table of Contents
- What rotor thickness variation actually is
- What causes DTV
- How to measure rotor thickness variation
- Minimum thickness is a separate check
- What to do when you find DTV
- How to stop it coming back
- Our perspective: DTV is a systems problem
- Matching parts to the job
- Frequently asked questions
- Sources
What rotor thickness variation actually is
A new rotor is machined so that both faces are parallel. Over time, uneven wear and heat leave some arcs of the disc slightly thicker than others. The difference between the thickest and thinnest point is the thickness variation, and some engineers simply call it parallelism.
The amounts involved are tiny. Production-level guidance for new rotors can be as tight as about 0.010 mm (0.0004 inch), because variation beyond that range can already produce perceptible pedal pulsation. For comparison, a human hair is several times thicker than that tolerance. You cannot see DTV, and you cannot reliably feel it with your fingers. You can only measure it.

Why it feels like a warped rotor
The popular explanation is that heat “warps” the disc. In practice, the shudder you feel is a thicker section of the rotor pushing back against the brake fluid each time it passes through the caliper, which effectively pumps the pedal. The pulsation rises and falls with wheel speed, which is why it is often strongest at highway speeds and fades as you slow down.
Some of what gets called warping is lateral runout, where the rotor wobbles slightly as it spins. Runout and DTV are linked: the caliper wears a rotor unevenly if it wobbles, and that wear creates thickness variation. They are two measurements of the same problem and both belong in a proper inspection.

What causes DTV
DTV does not appear from nowhere. These are the causes we see most often discussed in service guidance and the ones worth checking first.
- Hub flange runout. A brand-new, flat rotor mounted on a hub with excessive runout can develop DTV within roughly 4,800 to 11,300 km, because the pads keep dragging on one part of the disc and grind an uneven pattern into it.
- Dirty or rusted mounting surfaces. Rust scale or debris between the hub and the rotor hat tilts the rotor by a fraction of a millimetre. That is enough to start the wear pattern above.
- Uneven lug nut torque. Extreme heat and improper lug nut torquing are the primary culprits behind uneven wear. Impact guns used without a torque stick are a classic source.
- Heavy or repeated hard braking. Mountain descents, towing and track days put a lot of heat into the disc. Uneven heat leads to uneven wear and, over time, thickness variation.
- Pad material deposits. When a vehicle sits with hot brakes clamped on one spot, material can transfer unevenly to the rotor face and create a thick patch.
- Corrosion on parked vehicles. Winter road salt and damp storage leave pitting and rust rings on the friction surface. In Canada this matters more than most places. If you see it, our guide to rotor pitting explains when it is still safe to drive, and our piece on rotor hat rust in Canada lists the checks to run on the mounting area.
How to measure rotor thickness variation
The method is simple, but it only works if you are disciplined about it. Use a micrometer. A vernier or dial caliper does not have the resolution or the flat, parallel contact needed to read differences of a few thousandths of a millimetre.
Tools you need
- An outside micrometer in the right range for your rotor (a 0 to 25 mm or 1 inch model covers most passenger car rotors)
- A wire brush or emery paper
- A dial indicator with a magnetic base, if you also want to check runout
- Brake cleaner and clean rags
- A torque wrench
Step by step
- Clean the rotor face. Remove rust ridges at the outer edge and wipe off brake dust, since debris will skew a reading. If the wheel is covered in dust, a safe brake dust removal method keeps the cleaning from getting into your measuring area and your lungs.
- Mark eight points. Measure at 8 equidistant points around the friction surface, every 45 degrees, roughly 10 to 15 mm in from the outer edge. A paint pen or tape helps keep the positions consistent.
- Record each reading. Close the micrometer gently and use the ratchet so pressure is the same each time. Write down all eight numbers.
- Subtract. Take the smallest reading away from the largest. The result is your thickness variation.
- Compare to specification. Use the figure in the vehicle’s service information. If you cannot find one, treat variation of more than a few thousandths of a millimetre as a reason to replace, not to guess.
- Repeat on the other rotor and axle. Left and right rotors are inspected as a pair.
One sequence point matters. Manufacturer service information, such as this GM brake service document, states that thickness variation must be checked before the assembled lateral runout. If you measure runout first and the rotor has DTV, the numbers you get are hard to interpret.
A worked example
Suppose your eight readings, in millimetres, are: 25.02, 25.03, 25.01, 25.04, 25.02, 25.05, 25.03 and 25.02. The largest is 25.05 and the smallest is 25.01, so the variation is 0.04 mm. Many drivers would call that nothing, and the rotor is comfortably over its minimum thickness. But that spread is several times the production-level target quoted above, and it is the kind of rotor that can still produce pulsation. A rotor can measure well above minimum thickness and still fail on variation, which is exactly why the second measurement matters.
Minimum thickness is a separate check
DTV and minimum thickness answer different questions. Minimum thickness tells you how much metal is left to absorb heat and resist cracking. DTV tells you whether the surface is parallel.
Rotors are marked with a minimum thickness, usually cast on the hat or edge, commonly around 2 to 3 mm less than the new rotor thickness. Check the stamp on your own rotor, and do not rely on a generic number. For a technician-level walkthrough, our guide to the micrometer check for minimum rotor thickness covers the measuring points, and our article on coating wear and Ontario’s stamped minimum explains how to read the figure on coated rotors.
If you run a fleet or a work vehicle, build both measurements into your regular inspection routine. A fleet vehicle inspection checklist is a useful template for deciding what to record and how often.
What to do when you find DTV
You have three realistic options.
| Situation | Best action |
|---|---|
| DTV slightly over spec, rotor well above minimum thickness | Resurface on a lathe only if the rotor will stay above minimum afterwards, and fix the cause first |
| DTV over spec and rotor near minimum | Replace the rotors as a pair |
| DTV with deep pitting, heat spots or cracks | Replace the rotors as a pair, no machining |
Resurfacing removes metal, and the rotor has less margin each time. On the thinner rotors fitted to many modern cars, there is often too little material to machine at all. Blue heat spots are another sign to stop: our note on rotor glazing symptoms explains why those can defeat machining.
Do not replace pads alone
A common mistake is fitting new pads on an affected rotor. The new pads bed in unevenly against the thick and thin sections, and the vibration returns almost immediately. If you are chasing a pulsation complaint, the rotor is the first suspect and the pads are the second.
Replace in pairs
Rotors are replaced as a pair per axle so braking force stays even side to side. Matching pads go on at the same time. If you are budgeting, our overview of rotor replacement cost per axle in Canada sets out what to expect.
How to stop it coming back
Fitting a new rotor onto a bad hub is the fastest way to reproduce the problem. Use this short routine each time.
- Clean the hub to bare metal. Use a wire brush or emery paper on the hub face and the inside of the rotor hat, as recommended for mounting.
- Check hub runout with a dial indicator before mounting. If it is excessive, the hub or bearing needs attention, not just the rotor.
- Torque the lug nuts in a star pattern, in stages, to the vehicle’s specification.
- Confirm the rotor is the right type for the axle. Directional rotors have to go on the correct side, and our guide on checking vane lean shows how. Front and rear needs also differ, as our explanation of vented and solid rotors shows.
- Bed in the pads properly according to the pad manufacturer’s instructions, and avoid holding the pedal down firmly once the brakes are hot and the vehicle has stopped.
Our perspective: DTV is a systems problem
We build brake pads, rotors and kits around the idea that braking is an ecosystem. A rotor, a pad compound, a caliper and a lubricant all influence one another, and a fault in any one shows up as an uneven wear pattern on the disc.
That shapes how we think about thickness variation. Most DTV complaints we would expect to see are not a rotor defect. They come from mounting, torque and heat history. Our HydroAdaptive ceramic formulation is designed to stay consistent when the disc is wet, humid or cold, so that pad contact is more even from the first stop on a damp morning. We pair it with corrosion-resistant rotors because surface rust that builds up while a car sits is a real contributor to uneven contact in Canadian conditions. You can read more about how our technology works and the HydroAdaptive formulation.
Our advice is simple. Measure before you buy, so you replace what is actually worn. Clean the hub every time. When you replace rotors, replace the pads with them and treat the axle as one system.
— AAA
Matching parts to the job
If your measurements say the rotors have to go, we supply vehicle-specific Type 03 brake pads and Type 07 brake pads, along with SC Type rotors and GC Type rotors. Fitting a matched pad and rotor set together avoids the situation where new pads run on a surface that was not designed for them. You can also browse our full disc brake pad range to find your vehicle.
Frequently asked questions
What term refers to variations in the thickness of a rotor?
It is called disc thickness variation, or DTV. Some technicians call it a lack of parallelism. It describes the difference between the thickest and thinnest points on the friction surface.
How much thickness variation is acceptable?
The figure depends on the vehicle, so use the manufacturer’s service information. New rotors are produced to very tight tolerances, in the order of hundredths of a millimetre or less. Pulsation can become noticeable at levels you cannot detect by eye or touch.
Can I measure rotor thickness variation with a caliper?
No. A micrometer is the correct tool because it resolves small differences and gives consistent flat contact. A caliper is fine for a rough minimum thickness check, but it will miss DTV.
Should rotors be replaced in pairs?
Yes. Replace both rotors on an axle together so braking force stays even from side to side. Fit new pads at the same time.
Is a pulsating pedal always DTV?
Not always, but it is the most likely cause. Lateral runout, hub problems and sticking calipers can contribute. If you are unsure, have a qualified brake technician measure thickness variation and runout, and do not keep driving on brakes that feel unsafe.
Sources
- Brake Rotor Runout, Vehicle Service Pros
- Brakes and Brake System FAQ, Wolfe GM Buick
- Brake Rotor Thickness Variation Measurement, Industrial Monitor Direct
- GM brake rotor thickness variation service document, Mitchell