

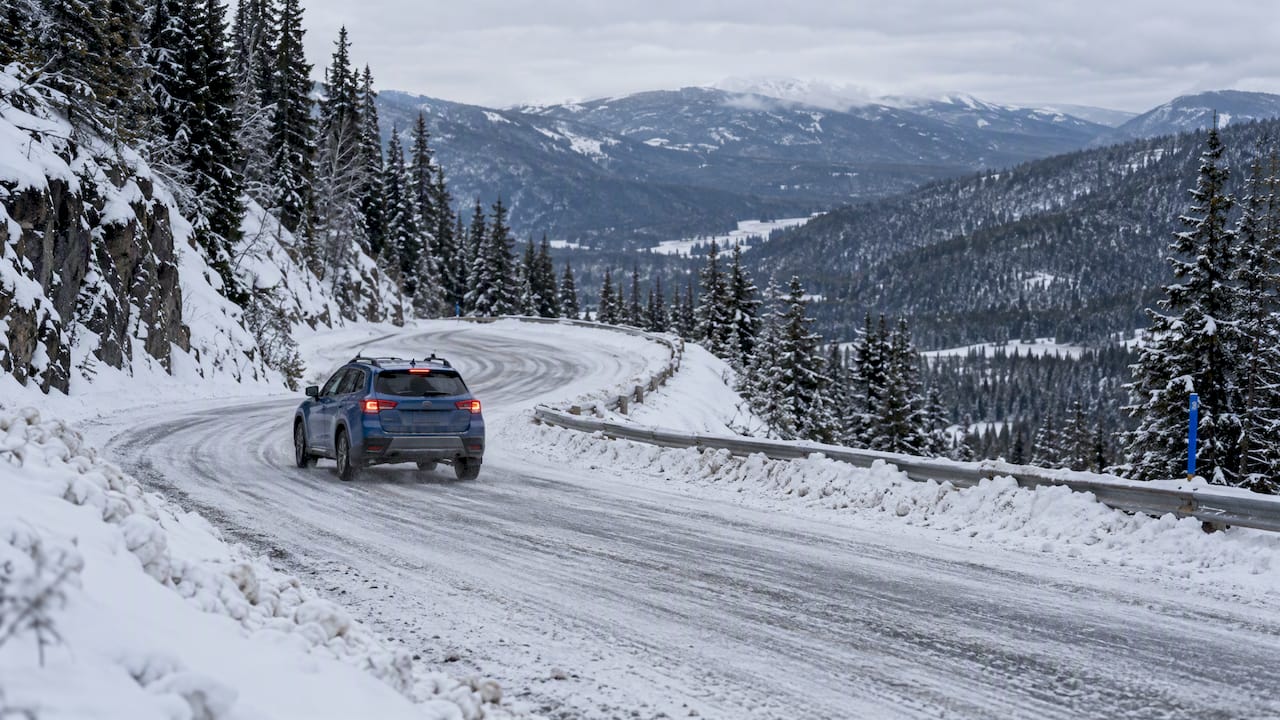
The safest approach on a mountain descent in winter is to slow down before the grade starts, drop into a lower gear for engine braking, and apply steady, controlled brake pressure rather than constant pressure, while keeping ABS and ESC switched on. Give yourself extra following distance, and if your brakes feel spongy or weak after driving through slush or deep snow, dry them with a few gentle stops before you need them for real.
TL;DR:
- Using winter tires can reduce stopping distances on ice by about half compared to all-season tires, which is critical on steep mountain descents.
- Maintaining brake system health through checks of brake fluid, pad thickness, rotor condition, and removing salt buildup prolongs brake effectiveness in winter conditions.
- Proper downhill braking involves early gear selection, pulsed braking, and avoiding continuous pressure to prevent heat buildup and brake fade.
- Wet brake fade after driving through slush or water can be mitigated by gentle stops and increasing following distance, while frozen brakes require gradual warming.
- Keeping traction control and electronic stability systems engaged enhances control on icy grades, while emergency symptoms like soft pedals or noise necessitate vehicle inspection before descending.
Table of Contents
- Why brakes behave differently in winter mountains
- Step-by-step actions on a mountain descent
- Recognizing and handling wet brake fade and freeze risk
- Pre-trip and winter checks to reduce mountain braking risk
- Warning signs that mean you should not keep driving
- The technical case for moisture management
- Winter-specific braking systems: chains and studded tires
- How road salt and winter debris affect your brakes
- A long descent, and what it taught us about braking
- How we can help with weather-ready braking hardware
- FAQ
- Sources
Why brakes behave differently in winter mountains
A long mountain descent asks more of your brakes than almost any other driving situation. Gravity keeps adding energy to the vehicle for kilometre after kilometre, and if your brakes are the only thing converting that energy into heat, they heat up fast. On a flat highway, a hard stop dissipates heat and the brakes cool before the next one. On a sustained grade, there is no cooling period, and the heat keeps stacking.
Two distinct failure modes come from this, and drivers often confuse them.
- Hydraulic fluid boil happens when brake fluid absorbs enough heat that it starts to vaporize, which puts compressible gas bubbles in the lines and gives you a soft, sinking pedal that needs more and more travel to do less and less.
- Pad glazing and fade happens when the pad material itself overheats and loses its grip on the rotor, producing a firm pedal that simply does not slow the vehicle the way it should.
Winter adds a second variable on top of heat: available friction. Cold rubber, packed snow, and ice reduce the grip your tires can put down before they start to slip, which means the braking system is often working near the edge of available traction even when it is working perfectly. Transport Canada advises reducing speed and increasing following distance in winter conditions specifically because stopping distances grow once traction drops.
Winter tires change that equation substantially. Winter tires can significantly reduce stopping distance on ice compared with all-season tires, according to lab and field testing that recorded stopping distances around 6.4 metres for winter tires against 12.1 metres for all-season tires under comparable icy conditions. That difference means a vehicle on winter tires can stop in roughly half the distance a vehicle on all-season tires needs, which matters enormously on a grade where you may already be managing heat and limited traction at the same time.
Step-by-step actions on a mountain descent
Good mountain braking is mostly decided before you touch the brake pedal. The sequence below keeps heat and traction working in your favour instead of against you.
- Read the grade before you commit to it. Look for descent warning signs, check your speed against the posted advisory, and slow down while you still have flat or gently sloped road to do it on.
- Select a lower gear early. In a manual, this means downshifting before the descent starts and matching revs reasonably rather than letting the engine scream or bogging it down. In an automatic, shift into a lower gear range or manual/tow-haul mode so the engine, not the brakes, absorbs most of the descent’s energy.
- Brake in controlled pulses, not one long squeeze. Apply firm, deliberate pressure to bring your speed down to a safe target, release, let the gear do the holding, then repeat as needed. Continuous light braking is the pattern that builds heat fastest and leads to fade or fluid boil.
- Watch for pedal feedback. A pedal that goes soft or sinks under sustained pressure is an early sign of fluid heating. Slow down further, increase your gear reduction, and give the brakes a longer rest between applications.
- Let ABS and ESC do their job during a slip. If the wheels start to lock or the back end steps out, keep your foot on the brake and let the anti-lock system pulse it. Transport Canada’s guidance on traction control notes these systems should stay on in almost all conditions and are only switched off in specific situations described in your owner’s manual, such as rocking a stuck vehicle free of deep snow.
Pro Tip: Practise shifting into your vehicle’s lower gear range on a flat, empty stretch before your trip, so the motion is automatic when you actually need it on a descent.
Our guide to ABS performance on ice walks through what that pulsing feeling under your foot actually means and why fighting it by pumping the pedal yourself makes things worse, not better.
Recognizing and handling wet brake fade and freeze risk
Wet brake fade shows up as a pedal that feels normal but delivers less stopping power than expected, usually right after driving through slush, a puddle, or a stretch of wet snow. A thin film of water sits between the pad and rotor and temporarily cuts the friction available, even though nothing is mechanically wrong.
The fix is straightforward and should happen before you need full stopping power, not during an emergency.
- Increase your following distance as soon as you suspect wet fade, since your real stopping distance is longer than it looks.
- Apply a few gentle, deliberate stops on a clear stretch of road to generate enough friction heat to boil the water film off the pad and rotor surfaces.
- Avoid holding constant heavy pressure to try to force the brakes to grip, since that behaviour keeps the water trapped and can push you toward fade instead of away from it.
- Never panic-stop as your first response to a soft-feeling brake; a hard, sudden application on a wet or icy surface is more likely to lock a wheel than clear the moisture.
Freezing brings a separate risk. A soaked brake assembly left to sit in sub-zero temperatures can have its pad and rotor surfaces freeze together, producing a locked wheel or a flat-spotted tire when you first move the vehicle. Transport Canada’s advisory on brake freezing notes that moisture retained in brake components poses this risk and recommends warming and drying procedures before relying on the system. In practice, that means light, deliberate braking during the first few minutes of low-speed driving after a vehicle has sat wet and cold overnight, which lets friction heat evaporate trapped moisture gradually. Our guide to brake fade on downhill stretches covers recovery in more detail if you are dealing with it on the road right now.
Pre-trip and winter checks to reduce mountain braking risk
A short inspection before a winter mountain trip catches the problems that turn a manageable descent into an emergency.
- Switch to winter tires below +7°C, and check tread depth and pressure before you leave, since the stopping-distance advantage documented in winter tire testing only applies when the tires themselves are in good shape.
- Inspect pad thickness and rotor condition, along with caliper operation and the mounting hardware, since uneven wear on one corner often shows up only under the load of a real descent.
- Check brake fluid age and consider a flush if it has been a few years, because fluid absorbs moisture over time and that moisture lowers its boiling point, raising the risk of fluid boil under sustained braking.
- Look for fluid leaks at the calipers and lines, and treat a low-fluid warning light as something to resolve before the trip, not during it.
Pro Tip: When you book a professional inspection, ask the shop to measure rotor thickness directly and test the fluid for moisture content rather than relying on a visual check alone, since both issues are easy to miss by eye.
Our piece on winter tires and brakes working together goes deeper into how tire choice and brake condition interact on cold, graded roads.
Warning signs that mean you should not keep driving
Some symptoms are not a “drive carefully and monitor it” situation. They mean stop and get the vehicle inspected before continuing, especially before a descent.
- A spongy or sinking pedal that needs increasing travel to produce the same stopping force.
- Grinding, scraping, or metallic noise when braking, which usually points to worn-through pad material contacting the rotor directly.
- Pulling to one side under braking, suggesting uneven pad wear or a caliper that is not releasing properly.
- Fade that returns even after several gentle, deliberate stops meant to dry the pads.
- A rapidly dropping fluid level or an illuminated brake warning light on the dash.
Any one of these on its own is worth a shop visit. Two or more together, especially before a mountain trip, mean the vehicle should not be on a descent until a technician has looked at it.
The technical case for moisture management
Standard ceramic pads can experience a measurable delay in regaining full friction after exposure to water, slush, or humidity, and that delay is exactly when drivers need their brakes to respond immediately.
Transport Canada’s winter preparation guidance frames brake fluid condition and rotor measurement as standard pre-winter checks, and that independent guidance lines up with what we build toward with HydroAdaptive technology: pads engineered to clear moisture quickly rather than hold a water film against the rotor. We describe this as our own engineering focus, not a substitute for the fluid checks and rotor measurements a technician performs, since fluid boil and worn rotors are mechanical issues a pad formulation alone cannot fix.
Winter-specific braking systems: chains and studded tires
Snow chains and studded tires exist to add mechanical grip when winter tires alone are not enough, typically on steep, icy, or ungraded mountain roads where some jurisdictions require them by regulation during specific months.
Chains need to match your tire size and vehicle clearance exactly, and they should go on before you reach the icy section, not after you are already sliding. Drive at reduced speed with chains fitted, since they are not designed for highway speeds and can damage both the chain and the road surface if pushed too hard. Remove them once you are back on clear pavement, since dragging chains on dry asphalt wears them out quickly and can affect handling.

Studded tires work differently: metal studs embedded in the tread bite into ice for extra grip, and they stay on for the whole winter season rather than going on and off for specific sections. They need the same pressure and tread checks as any winter tire, and studs do wear down over a season of use, so a tire that performed well in December may have noticeably less bite by March.
Both options add grip, not stopping power on their own. They work alongside the braking techniques in this guide, not instead of them, so the gear selection, pulsed braking, and following distance habits above still apply with chains or studs fitted.
How road salt and winter debris affect your brakes
Road salt is effective at melting ice, and that same chemical aggressiveness is hard on the metal components of your braking system. Salt spray coats rotors, calipers, and brake lines through the winter, and that exposure accelerates corrosion, particularly on rotors that sit unused for a day or two and develop surface rust that can affect the initial bite of the brakes until it wears off.
Sand and grit used for traction on mountain roads add a second problem: abrasive debris works its way between the pad and rotor and acts like fine sandpaper, gradually wearing both surfaces faster than clean, dry conditions would. Over a full winter of salted, sanded mountain roads, that combination of corrosion and abrasive wear is a major reason rotors and pads wear out faster than they would on a comparable amount of dry-weather driving.
Rinsing the undercarriage periodically during winter, especially after driving through heavily salted sections, helps slow the corrosion. It will not stop wear entirely, but it reduces the buildup that leads to pitted rotors and seized hardware by spring. Corrosion-resistant rotor coatings help here too, since a coated surface resists the salt exposure that bare metal cannot.
A long descent, and what it taught us about braking
A long, icy descent off a mountain pass is not the place to discover your brakes are tired. Picture a driver dropping into low gear well before the grade steepens, letting engine braking hold most of the speed, and tapping the brakes in short, firm pulses only to trim speed at the switchbacks, never leaning on them continuously.
Three things matter most: prepare before the trip, not during it; use gear selection as your primary tool and brakes as the backup; and treat any fade, noise, or soft pedal as a reason to stop and check, not to push on and hope.
— AAA
How we can help with weather-ready braking hardware
We use braking hardware designed for the moisture, cold, and heat cycling that mountain winter driving puts on a brake system. Our Type 03 Brake Pads and Type 07 Brake Pads use HydroAdaptive ceramic technology designed to clear moisture quickly and hold consistent friction through wet, snowy, and humid conditions, which is our own engineering claim about how the formulation behaves.

- Our SC Type Rotors and GC Type Rotors pair corrosion-resistant coatings with the pad compounds above for winter-exposed driving.
- Our pads and rotors are sold as vehicle-specific sets, so fitment matters more than a generic size guess.
If you are not sure which pad or rotor set fits your vehicle, our guide to choosing brake pads walks through the fitment questions before you check compatibility and order.
FAQ
Is it better to drive with traction control on or off in snow?
Traction control and ESC should stay on in almost all winter driving, since Transport Canada’s guidance confirms these systems help maintain control on low-traction surfaces. They are switched off only in specific situations described in your owner’s manual, such as rocking a vehicle free from deep snow.
What is ghost braking?
Ghost braking refers to a vehicle’s automated system applying the brakes without an obvious hazard present, most often discussed in the context of driver-assistance and semi-autonomous features rather than winter mountain driving specifically. It is not a documented factor in manual mountain winter braking technique.
What is the 30/30/30 rule for brakes?
There is no established, widely recognized rule for brake maintenance or technique in winter driving guidance. Definitions circulating online vary and are not consistent with the Transport Canada or braking research referenced in this guide, so we would not rely on them as a standard.
What’s the worst car to drive in the snow?
No specific vehicle model is consistently documented as the worst for snow driving, since outcomes depend heavily on tires, weight distribution, and maintenance rather than the vehicle alone. What is well documented is that winter tires cut stopping distance on ice roughly in half compared with all-season tires, which matters more than the vehicle badge on most mountain roads.
Sources
- Driving safely in winter — Transport Canada
- Tire performance and stopping distances — Traffic Injury Research Foundation (TIRF) / related lab tests