

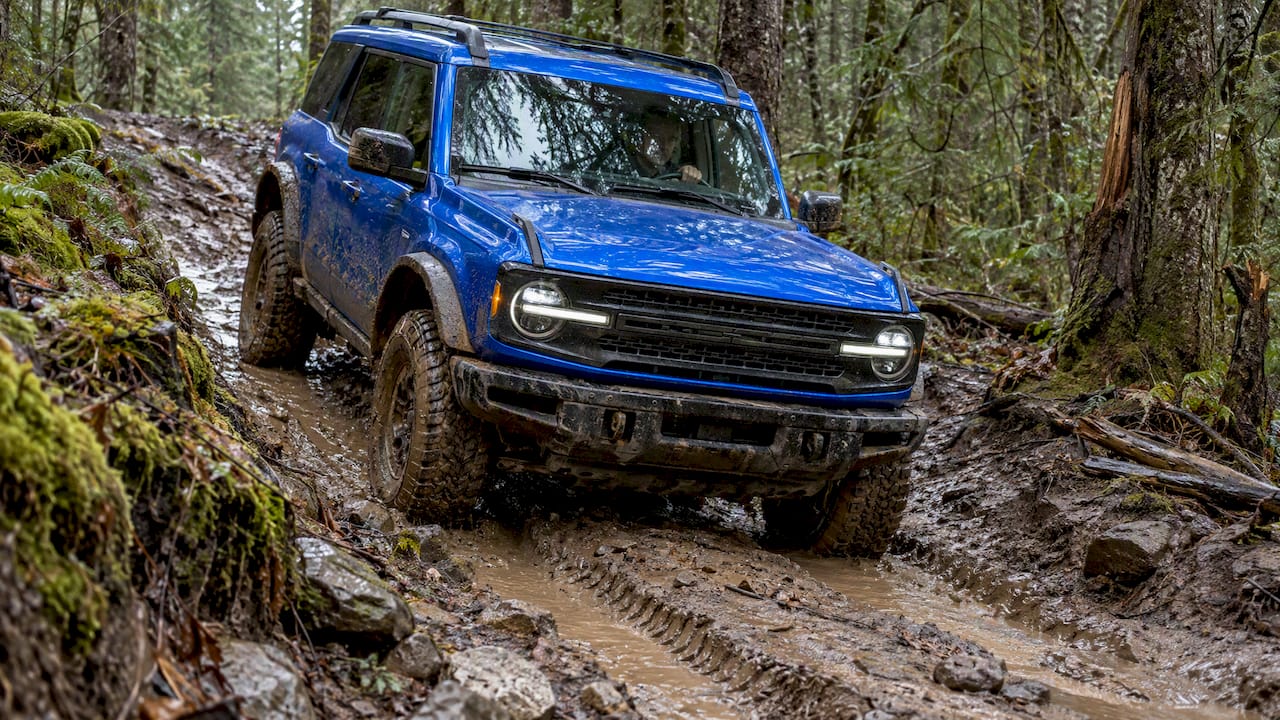
Braking in mud works differently from braking on pavement. The tires have little grip to give, so the best technique is to brake less: lift off the throttle early, let the engine slow the vehicle, and use the pedal gently and in a straight line. Afterwards, the brakes need attention too. Mud holds moisture against the rotors and pads, so a wash, a drying drive and a quick inspection belong at the end of every muddy run.
This guide covers both halves: how to slow and stop on a muddy trail, and how to look after your braking system once you are back on the road.
TL;DR
- Lift off the throttle before you brake, brake in a straight line before a turn, and be gentle when the ground is slippery.
- On muddy descents, use low gear and engine braking. Avoid sudden, heavy pedal inputs that can lock the wheels.
- If you stall on a muddy climb, stop the vehicle rolling back by applying the brakes gently, then reassess before you move.
- After the trail, wash the wheels and brakes, then make a few firm stops to generate heat and dry them.
- A warning lamp that stays on, a soft pedal or new noises after mud mean a mechanic should look at the brakes.
Table of Contents
- How mud changes braking
- Read the mud before you enter
- How to brake in mud, step by step
- Descents: let the engine do the work
- When you slide or lose traction
- What mud does to brake hardware
- After the trail: wash, dry, test
- Our perspective: brakes as a system in wet, dirty conditions
- Brake parts for drivers who see mud, rain and salt
- When to have a mechanic look at the brakes
- FAQ
- Sources
How mud changes braking
On a dry road, a tire grips through friction with a firm surface. In mud, the surface itself moves. A thin layer of slurry sits between rubber and the ground, and a heavy pedal press stops the wheel turning faster than the vehicle slows down. The result is a locked wheel, a vehicle that slides on, and steering that no longer responds.
That is why trail guidance keeps repeating the same advice. The Ontario Trails Council’s 4WD guidance warns that too much throttle in mud digs you in deeper and reduces traction. The same logic applies to the brake pedal: abrupt inputs of any kind upset the little grip you have.
Tires matter as much as brakes here. According to BFGoodrich Canada, mud-terrain tires with aggressive tread shed mud better than standard all-terrain tires, which can pack with mud and lose grip. A tire packed with mud cannot bite, however good the brakes behind it are.

Read the mud before you enter
Most braking problems in mud begin before the first puddle. Slow down and look at what is ahead.
- Depth and hardness. BFGoodrich Canada advises assessing how deep and how firm the mud is before you enter it.
- Tire tracks. Fresh tracks show where earlier vehicles went through, and how far they sank.
- Your exit. Know where you will slow down and where the ground firms up. Braking is far easier on a firm patch than in the middle of a bog.
- Your owner’s manual. The Newfoundland and Labrador off-road vehicle training manual tells riders to consult the operator’s manual for guidance specific to the vehicle. Low-range ratios, traction control and hill-descent features differ by model.
If the mud looks deeper than your ground clearance, or you cannot see what is under it, the best braking decision is to stop before you enter and walk it.
How to brake in mud, step by step
The provincial training material is consistent on the basics. The Newfoundland and Labrador manual says to release the throttle before braking, to brake in a straight line before entering a turn, and to brake gently if the ground is slippery. Put into practice:
- Slow early. Your speed on entry sets everything. Make your speed decision well ahead of the mud, while the ground is still firm.
- Come off the throttle first. Let the vehicle begin to slow on its own before your foot reaches the pedal.
- Straighten the wheels. Finish your braking before the turn. Steering and braking at the same time asks a muddy tire to do two jobs with grip for one.
- Squeeze, do not stab. Apply light, progressive pressure. Hard braking can lock the wheels and cost you control, as trail guides ranking for this topic also warn.
- Ease off if the vehicle stops responding. If the steering goes light, release a little pedal pressure so the wheels can turn again, then reapply more softly.
- Keep steering smooth. Avoid abrupt steering as well as abrupt braking. Smooth inputs preserve traction.
Momentum and brakes work together
Mud rewards a steady pace. A vehicle that is crawling at a constant speed rarely needs the brakes at all. The aim is to avoid the situation where you must stop hard, which usually comes from entering too fast or from sudden changes in pace.
Descents: let the engine do the work
Muddy hills are where drivers are most tempted to ride the pedal, and where it is least effective. The Ontario Trails Council advises using low gear (engine braking) when travelling down hills, and avoiding sudden heavy braking. The same page recommends low gear for traversing muddy sections generally.
In a manual or automatic with a low range, that means:
- Select low range and a low gear before you start down, not halfway.
- Keep your feet off the throttle and let engine drag hold the speed.
- Use the brake pedal only to trim speed, in light, short squeezes.
- Keep the vehicle pointed straight down the fall line where you can.
A local dealer’s guide to the 2025 Jeep Gladiator, published by Mac Lang, makes a useful point: a 4:1 low-range transfer case does more than reduce speed. It gives you fine throttle and engine-braking control for technical obstacles like deep mud. If your vehicle has a low range, a muddy descent is the moment to use it.
When you slide or lose traction
A slide in mud is not a failure of your brakes. It is the surface doing what mud does. What matters is your next move.
- Sliding sideways on an incline. The Ontario Trails Council says to stop and reassess the situation. Do not fight it with more throttle or a panic stab at the pedal.
- Stalled on a muddy climb. The Newfoundland and Labrador manual stresses preventing the vehicle from rolling backwards. Apply the brakes gently to stop the slide, then work out your next step. Follow the operator’s manual when using reverse, since improper use can cause injury or damage.
- Stuck. Michelin Canada’s mud driving tips advise against sustained wheel spinning. Consider traction aids, gentle rocking, or recovery help instead.
Spinning wheels also heat the surrounding parts and pack more mud into the wheel wells. Stopping early is better for the vehicle as well as for your safety.
What mud does to brake hardware
Mud is wet, gritty and sticky, which is a hard combination for a braking system. Fine grit works its way between pad and rotor, and moisture sits against bare metal and moving parts. Slides and pins on calipers can stiffen as dirt dries around them. BFGoodrich Canada also notes that packed, dried mud can throw off wheel balance and reduce braking power once you are back on the road, so clearing it from the wheels is not only cosmetic.

This is the weather problem we design around at AAA Frictions. Moisture on friction surfaces, corrosion on rotors and stiff calipers in the cold are the three recurring ways wet conditions erode braking consistency. Our guide to flood water and brakes explains what happens when the system is submerged, and much of it applies to a deep mud crossing too.
After the trail: wash, dry, test
The habit that protects your brakes most is the one at the end of the day.
1. Wash thoroughly
BFGoodrich Canada recommends washing the undercarriage, brakes and wheels with a high-pressure hose. Work around the calipers, the rotor faces, the inner wheel barrels and the wheel wells. If you use a pressure washer, keep a distance. Tesla’s cleaning guidance for the Cybertruck advises staying at least 30 cm (12 inches) from the surface and not concentrating the jet on one spot, which is sensible practice on any vehicle. For stubborn residue on the wheels, a guide to removing brake dust safely shows how dwell time lets a cleaner do the work without hard scrubbing.
2. Dry the brakes with a few firm stops
Once you are out of the water, BFGoodrich Canada suggests testing the brakes: a few firm stops generate heat and help dry them. Tesla’s service bulletin on brakes exposed to road salt gives the same direction after washing: a cautious short drive with multiple firm brake applications to dry the pads and rotors.
Do this somewhere safe, with clear road behind you, and keep the stops firm but controlled rather than violent.
3. Look for damage
With the wheels clean, check what you can see:
- Rotor faces for deep grooves, uneven wear or heavy rust
- Pad thickness through the caliper opening or wheel spokes
- Brake hoses and lines for cuts, rubbing or leaks
- Caliper area for stuck mud, bent shields or stones lodged against the rotor
Our articles on drying brakes while driving and restoring grip on wet brake pads go through the drying routine in more detail.
A note for hybrids and EVs
Tesla’s service documentation points out that vehicles using regenerative braking may build up less heat in the friction brakes during light driving. That can delay the natural drying of moisture, so deliberately drying the brakes with firm stops after muddy or salty exposure matters even more. Our guide to regen braking on ice covers related behaviour in winter.
Our perspective: brakes as a system in wet, dirty conditions
We build brake parts around one problem: weather changes how brakes behave. Mud is the harshest version of that, combining moisture, grit and, on Canadian trails, cold mornings and road salt on the drive home.
We design around three weak points. Moisture on the friction surface is what our HydroAdaptive pads are made to manage, aiming for stable friction. Corrosion from moisture and road salt is the job of our GEOMET-coated rotors. Caliper movement in winter cold and summer heat is what ClimateFlex calipers are engineered for. Each addresses a different stage of the same trip.
We also develop rotors and pads as a matched system, and we sell rotors only with compatible pads. A rotor and pad chosen separately can behave differently from a pair engineered to work together, and in a harsh environment you want the pair to stay predictable.
Our view on technique is simple: better parts never replace good driving. Slow down early, use engine braking, and treat the pedal gently. Then give the brakes the cleaning and inspection they have earned.
— AAA
Brake parts for drivers who see mud, rain and salt
If your pads and rotors are worn, or you are replacing them after a season of trails and wet commutes, we offer vehicle-specific Type 03 brake pads, Type 07 brake pads, GC Type GEOMET-coated rotors and SC Type rotors. For Mitsubishi Outlander owners, there is a complete front and rear brake kit for 2014-2019 models with HydroAdaptive ceramic pads and GEOMET-coated rotors.

Check fitment for your vehicle on the product page before you order.
When to have a mechanic look at the brakes
Mud can hide damage, so some signs should not wait for the next service.
- A brake warning lamp that stays on. Ford Canada advises having the vehicle checked by a dealer as soon as possible when the brake system warning lamp stays illuminated. The principle applies to any make: see a qualified technician.
- A soft or sinking pedal, or one that needs to be pumped, suggests a fluid or hose problem.
- Pulling to one side when braking can point to a stuck caliper.
- Grinding, scraping or a persistent vibration that does not clear after the wash and drying stops.
- Visible damage to a line, rotor or caliper after an impact with rocks or stumps.
This is a legal matter as well as a safety one. Provincial standards such as the Ontario passenger and light-duty vehicle inspection standard require brake systems to be maintained to perform safely, and the same document and Alberta’s vehicle equipment rules allow vehicles with inadequate braking to be ordered off the road. Check your own province’s inspection requirements.
If the pedal feels odd only in wet weather, our guide to pedal feel in rain lists quick checks before you book a shop visit.
FAQ
Should I use the brakes or engine braking going down a muddy hill?
Use engine braking first. Select low gear before the descent and let the engine hold your speed, as the Ontario Trails Council advises. Use the pedal only in light touches to adjust speed, since sudden heavy braking can lock the wheels.
Why do my wheels lock up when I brake in mud?
Mud gives tires very little grip, so a hard press stops the wheel turning faster than the vehicle slows. Release the throttle early, brake in a straight line and squeeze the pedal gently. If the vehicle stops responding, ease off slightly so the wheels can turn again, then reapply.
How do I dry my brakes after driving through mud or water?
Wash the wheels and brakes first, then make a few firm but controlled stops once you are clear of the water. The heat generated helps dry the pads and rotors. Choose a quiet stretch of road, and read our guide on brake fade in rain after three gentle stops if the pedal feels different afterwards.
Can mud damage my rotors and pads?
Yes, it can. Grit and moisture trapped around the brakes can contribute to wear and corrosion, and dried mud on wheels can reduce braking performance. Regular washing, a drying drive and a visual inspection after muddy trips reduce the risk.
Sources
- 4WD Smart, Ontario Trails Council
- Off-Road Terrain Tips for Canadian Trails, BFGoodrich Canada
- Off-Road Vehicles training manual, Government of Newfoundland and Labrador
- Choosing Between the 2025 Jeep Gladiator Rubicon and Mojave, Mac Lang
- Mud Driving Tips, Michelin Canada
- Tech Note: Clean and Lubricate Brake Calipers Exposed to Road Salt, Tesla
- Passenger / Light-Duty Vehicle Inspection Standard, Ministry of Transportation of Ontario
- What do the warning and indicator lights in my Ford mean?, Ford Canada