

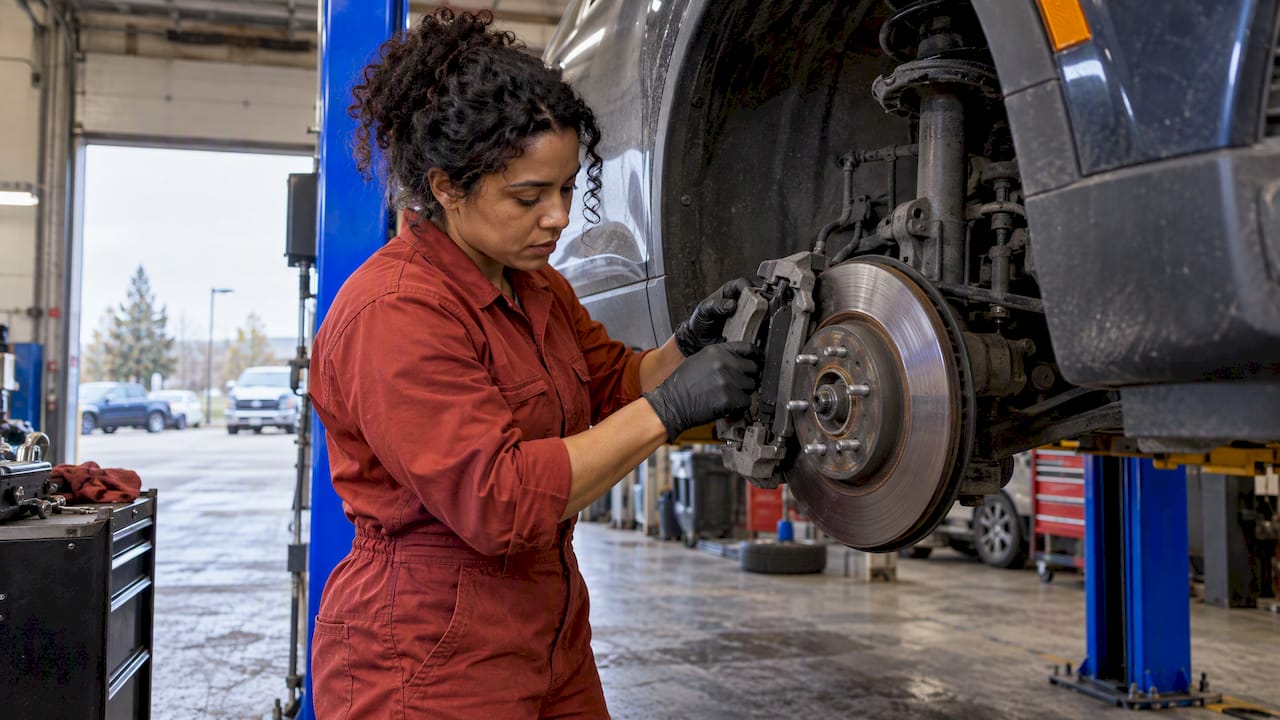
If your pads are near the end of their life, or your rotors are pitted or scored, replace them in the fall, before the first snowfall and the first salted road. Winter does not wear out brakes in a single week, but it exposes every weakness: thin pads, seized slide pins, corroded rotors and a soft pedal all get worse when roads are wet, cold and covered in brine. This guide shows what to check, what to replace, in what order, and how to choose parts that hold up in Canadian conditions.
TL;DR
- Book a brake inspection in October or early November. Transport Canada recommends a thorough brake check as part of winter preparation.
- Replace pads at about 3 mm of friction material, or sooner if you hear grinding, feel pulling, or notice a softer pedal.
- Replace rotors that are deeply pitted, scored or below minimum thickness. Light surface rust that clears after a few stops is normal.
- Service caliper slide pins whenever you change pads. Seized pins cause drag, uneven wear and overheating.
- Choose pads and rotors as a matched set, built for moisture and cold, rather than the cheapest part that fits.
Table of Contents
- Why fall is the right time to do brakes
- What winter does to your braking system
- Signs your brakes need replacing now
- Pads: when to replace them
- Rotors: replace, resurface or keep?
- Calipers, slide pins and hardware
- A fall brake timeline
- Choosing parts that suit Canadian winters
- Our perspective: brakes are an ecosystem
- Where our parts fit in a fall brake job
- DIY or shop?
- Frequently asked questions
- Sources
Why fall is the right time to do brakes
Brakes are a safety system you test hardest at the worst moment: the first slippery intersection of the year. By then the shop is booked solid, parts are on backorder, and you are deciding under pressure.
Fall gives you three advantages. Roads are still mostly dry, so you can bed in new pads properly and feel how the car behaves before the first snow. Shops and online stores have stock for your vehicle. And you can fix a problem when it is a pad swap rather than a pad, rotor and caliper job, because pads worn to the backing plate damage rotors quickly.
There is also a practical point. Winter braking is not only about stopping distance on ice, which is mostly a tire question. It is about consistency: the pedal should feel the same on the tenth stop of the morning as on the first, whether the rotors are wet, cold or crusted in slush. Worn or poorly matched parts make that consistency harder to get.
What winter does to your braking system
Brake components are mostly exposed to the elements. Pads, rotors, calipers and hardware sit right behind the wheel, where they take spray, grit and brine. Three things go on at once.
Moisture film. Water on the rotor surface can delay the first bite of the pad. Standard ceramic pads can feel slightly slow in damp or humid weather because moisture has to clear before friction builds fully. That is the specific problem our HydroAdaptive formulation was designed to address.
Salt and brine. Salt accelerates corrosion on rotor surfaces, slide pins and caliper hardware. Rotors that sit overnight in a salted driveway develop a rust layer that normally wipes off after a few brake applications. Deeper pitting does not wipe off, and it reduces the contact area your pads rely on. If you want to understand the difference, see our guide to flash rust on rotors.
Freeze-thaw cycles. Water gets into slide pin boots, freezes, and then thaws again. Pins that are dry or contaminated stick, and a caliper that does not release fully keeps a pad pressed against the rotor. The result is uneven wear, heat and pulling to one side.
The salt problem is bigger than brakes alone. Protecting paint and underbody is part of the same fall routine, and a practical overview of road salt protection for cars covers what helps on the exterior. For the brake corner specifically, our monthly checks for road salt corrosion walk through what to look at.

Signs your brakes need replacing now
Some signs mean you should not wait for a convenient date. Transport Canada lists pulling, a change in pedal feel and unusual squealing or grinding as reasons the brakes may need repair. In practice that breaks down as follows.
| Symptom | What it usually means | Action before winter |
|---|---|---|
| High-pitched squeal when braking lightly | Wear indicator touching the rotor, or glazed pads | Inspect pads this week |
| Grinding, metal-on-metal sound | Friction material gone, backing plate on rotor | Stop driving it; replace pads and likely rotors |
| Pulling to one side | Seized slide pin, stuck caliper, or uneven wear | Inspect the caliper and pins before anything else |
| Soft or spongy pedal | Air or moisture in fluid, or a hydraulic fault | Have it diagnosed by a licensed technician |
| Vibration through pedal or wheel | Rotor thickness variation, pitting or hub runout | Measure rotors; see below |
| Brake warning light | Low pad, low fluid or ABS fault | Diagnose before the first snowfall |
We have also put together 10 worn brake pad signs that show up before rotor damage, which is worth reading if your car is only giving you subtle hints.
A soft pedal or a brake warning light is not a part you fit yourself on a guess. Hydraulic faults and ABS issues need a licensed technician with the right equipment.
Pads: when to replace them
New pads typically start around 10 to 12 mm of friction material. A common replacement point is about 3 mm, and many cars have a dashboard warning or an audible wear indicator that triggers near 2 to 3 mm. Your owner’s manual or the vehicle’s service schedule gives the figure for your model.

The question for fall is not only “is there any life left?” but “will these pads last until spring?” If you have 4 mm left in October and you drive in stop-and-go traffic, you will probably be below the limit by February, when you least want to do the job. Replace them now.
Glazing is another winter issue. Pads that get hot and then cool quickly in cold, wet conditions can develop a hard, shiny surface that reduces bite. It is often tied to worn or missing hardware, and we cover the fix in our article on winter brake pad glazing.
Check pad wear on both sides of each axle. A big difference between left and right, or between inner and outer pads on the same caliper, points to a sticking slide pin or caliper rather than normal wear.
Rotors: replace, resurface or keep?
Rotors cause the most confusion in fall brake jobs, so here is a simple way to sort them.
- Light surface rust, even across the face. Normal after moisture. It usually clears after a few stops. No action needed.
- Rust ridge on the outer edge. Common and not a fault by itself, but a large lip suggests the rotor has worn and should be measured.
- Deep pitting or scoring. This reduces the friction surface and can shorten the life of new pads. Replace the rotor.
- Below minimum thickness. The minimum is stamped on the rotor or listed in the service manual. Replace it, do not machine it.
- Blue discoloration or heat cracks. Signs of overheating. Replace and find out why it overheated.
When you fit new pads on old rotors, you risk poor contact, noise and uneven wear. Many mechanics recommend pairing new pads with new rotors when rotors are near their limit or visibly damaged. Rotor life depends heavily on environment: salt, moisture and braking habits matter more than a mileage figure, and winter driving with road salt accelerates surface degradation.
Before blaming a vibration on warped rotors, rule out other causes. Our article on warped rotors in winter explains three checks that often solve the problem without guesswork.
If your vehicle has directional rotors, match the vane direction to the side of the car. Our guide to checking vane lean on directional rotors shows how. And if you are deciding between rotor types for your axle, vented versus solid rotors explains why the front axle changes the answer.
Calipers, slide pins and hardware
This is the part that is skipped most often, and in Canada it is where fall jobs succeed or fail. Slide pins let the caliper float so both pads press evenly. Salt and water get in, the grease dries out, and the pin sticks. A caliper that cannot slide drags a pad, overheats the rotor and wears the pads unevenly.
Whenever you replace pads:
- Remove, clean and inspect the slide pins and boots.
- Replace torn boots or corroded pins.
- Lubricate with a high-temperature brake grease intended for slide pins. Never use ordinary grease, which can swell rubber boots.
- Replace worn or rusted anti-rattle clips and shims. They are cheap and make a real difference to noise and pad movement.
- Check that the caliper piston retracts and moves smoothly.
We have a walkthrough for this: caliper slide pin maintenance takes about 15 minutes per corner for a DIYer with basic tools. If a caliper piston is seized or leaking, that is a replacement job, and it should be done in pairs on an axle. Our ClimateFlex calipers are built for exactly this kind of exposure.
Brake fluid also absorbs moisture over time. If it is overdue per your manufacturer’s schedule, fall is a sensible time for a fluid service by a qualified technician.
A fall brake timeline
You do not need to do everything in one weekend. This schedule works for most Canadian drivers.
- Late September: Take a wheel off and look. Measure pad thickness, check rotor faces, check boots and hoses.
- Early October: Order parts matched to your vehicle and make a shop booking if you are not doing the work yourself.
- Mid October to early November: Install pads, rotors and hardware. Bed in the new pads on dry pavement.
- Before winter tires go on, or at the same appointment: Have brakes and tires checked together. Tires come first for grip, a point we cover in winter tires and brakes.
- After the first salted week: Re-check for dragging, uneven pad wear or new noises.
The exact dates shift with your region. Drivers in Alberta, Manitoba or Newfoundland and Labrador often see winter conditions weeks before parts of southern Ontario or coastal British Columbia, so move the whole schedule earlier if you live there.
Choosing parts that suit Canadian winters
The cheapest part that fits is rarely the right answer for a vehicle that sees brine for five months. Look at five things.
- Pad material and moisture behaviour. Ask how the pad performs when wet and cold, not only in dry testing. Industry researchers note there is no standardized test for brake pad lining robustness in cold conditions, so manufacturer claims deserve scrutiny.
- Rotor coating. A corrosion-resistant coating protects the non-friction surfaces of the rotor, such as the hat and vanes, where rust starts.
- Matched components. Pads and rotors designed to work together give a more consistent friction profile than random combinations.
- Hardware included. New clips, shims and lubricant remove the temptation to reuse corroded parts.
- Vehicle-specific fit. Confirm the part number for your exact year, model and axle.
Our own guidance on this is in matching pads, rotors and hardware for winter upgrades, and the broader decision is covered in which brake pads to choose for your car.
Our perspective: brakes are an ecosystem
We build brakes for drivers who cannot predict the weather, and a few convictions come from that work.
First, winter braking trouble is rarely one part failing. It is usually a chain: a seized pin drags a pad, the pad overheats the rotor, the rotor develops a hot spot, and the driver feels a vibration and blames the rotor. That is why we think of pads, rotors, calipers and lubricants as one ecosystem, and why we sell them as matched sets.
Second, wet friction is a design problem, not a driver problem. Standard ceramic pads can show delayed bite and an inconsistent pedal in humid or wet weather. Our HydroAdaptive ceramic technology is engineered to clear moisture quickly and hold a stable friction profile across a wide temperature band, so the pedal feels the same from a damp November morning to a cold February commute. You can read the engineering detail on our technology page and in the HydroAdaptive formulation overview.
Third, tires still come first. Better brakes do not create grip the tires cannot provide. What they do is deliver the force you ask for, every time, without fade or lag. We explain that honestly in performance brakes and snow.
— AAA
Where our parts fit in a fall brake job
If you are replacing pads and rotors before winter, we offer vehicle-specific options built around HydroAdaptive ceramic technology:
- Type 03 brake pads and Type 07 brake pads for moisture management and consistent pedal feel.
- SC Type rotors and GC Type rotors, with GC rotors carrying a GEOMET coating for corrosion resistance.
- Full kits that pair pads and rotors for specific vehicles, such as the Toyota Highlander 2008 to 2019 front kit.
Search by your vehicle’s year, make and model to confirm the correct part before you order. Rotor choice itself matters too, so see our notes on rotor brands for safety and longevity.
DIY or shop?
Pads, rotors and slide pin service are within reach of a careful home mechanic with a jack, stands, a torque wrench and a service manual. Never work under a car supported only by a jack, and always torque wheel and caliper bolts to specification.
Hand the job to a licensed technician if you see any of the following: a soft or sinking pedal, fluid leaks, a seized piston, a brake or ABS warning light that stays on, or any doubt about the work you have done. After any brake job, test the car at low speed in a quiet area before you join traffic.
Bed-in matters. Follow the instructions that come with your pads: typically a series of moderate stops from a set speed without coming to a complete halt, followed by a cool-down drive. Doing this in dry October weather is far easier than in January.
Frequently asked questions
Can cold weather damage my brakes?
Cold alone rarely damages brakes, but cold combined with moisture and salt does. Brine corrodes rotors and slide pins, and freeze-thaw cycles can stick calipers. Worn pads and weak hardware show their problems faster in winter, which is why a fall inspection makes sense.
How long do brake pads and rotors last in Canada?
It depends on driving style, vehicle weight and road conditions rather than a fixed distance. Pads commonly need replacing somewhere in the range of tens of thousands of kilometres, and salt exposure can shorten rotor life. Measure thickness and inspect condition each fall instead of relying on a number.
Should I replace rotors every time I replace pads?
Not always, but often in salty regions. If rotors are above minimum thickness, smooth and free of deep pitting, they can sometimes stay. If they are pitted, scored, uneven or near the limit, replace them with the pads for even contact and quieter operation.
Is surface rust on my rotors a reason to replace them?
Usually not. Light rust from moisture clears after a few brake applications. Deep pitting or scoring is different, and a technician should inspect it because it reduces the friction surface and can affect stopping.
When is too late to replace brakes before winter?
There is no cutoff, but the risk rises once salt is on the road and shops fill up. Aim for mid October to early November in most regions, earlier in the Prairies and Newfoundland and Labrador. If you have grinding or a soft pedal now, do not wait for a better date.
Sources
- Preparing your vehicle for winter, Transport Canada
- Can rotors last 150k miles?
- Proposed Test Method for Brake Pad Lining Robustness in Cold Conditions, SAE