

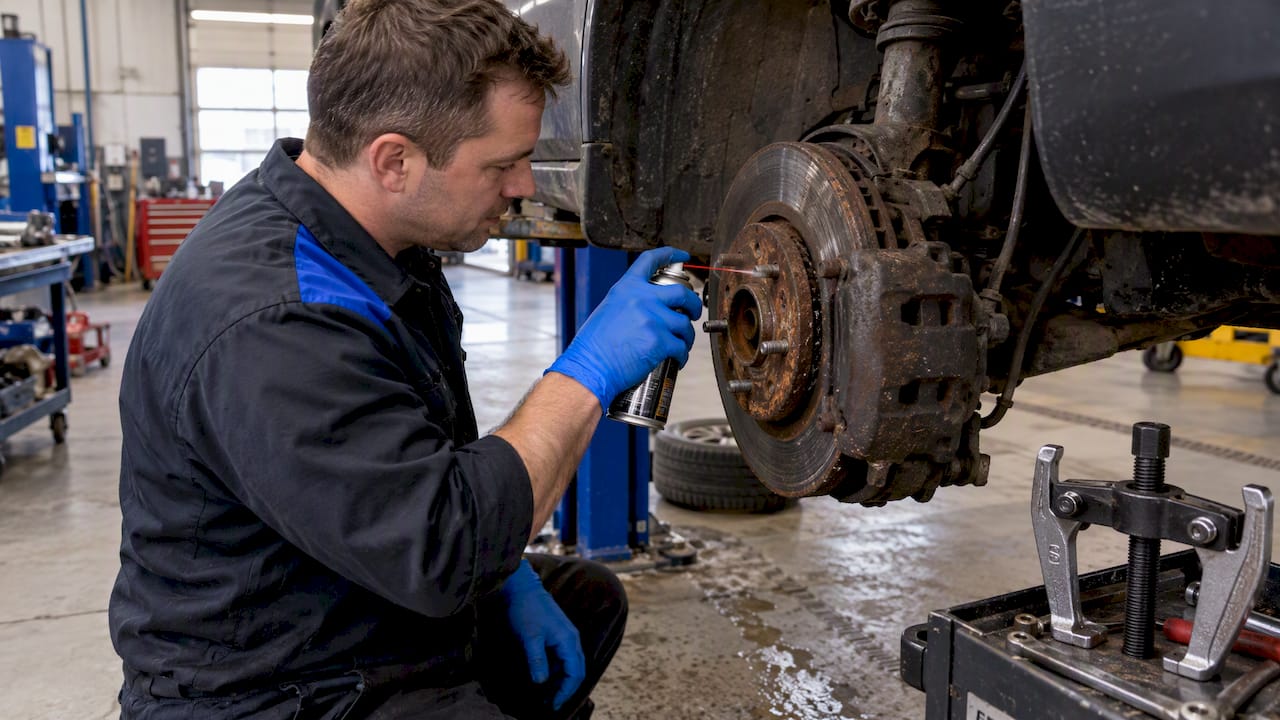
The fastest safe path is a clear sequence: soak the hub with penetrating oil for 10 to 30 minutes, tap the rotor to break the rust bond, then remove the retaining screws with an impact driver. If the rotor still will not budge, escalate to a rotor puller, and reach for controlled heat only as a last resort. Always inspect thickness before reinstalling or reusing.
TL;DR:
- Remove retaining screws with a seated impact driver; if a head is rounded or broken, drill or grind it out because lug nuts provide clamping force.
- When tapping fails, center the puller on the hub’s reinforced pilot, tighten its legs evenly, and leave a lug nut loose to catch the rotor.
- Stop and call a shop if corrosion has fused the hub, a stud is damaged, or heat could reach the bearing or ABS wiring.
- After removal, replace rotors with cracks, deep pitting, or thickness below the stamped minimum; resurface only if machining leaves them above that limit.
- Clean the hub face to bare metal, apply anti seize only to the pilot, and torque lug nuts to specification in a star pattern.
Table of Contents
- Essential tools and supplies you should have before you start
- Stepwise methods from soak-and-tap to puller and heat
- When and how to use heavy-duty pullers and other advanced measures
- Cleaning the hub mating surface and inspecting rotors and hardware after removal
- Installation and maintenance steps to stop rotors from seizing again
- Practical guidance for keeping rotors from corroding in the first place
- When DIY removal is reasonable and when to get professional help
- Replacement rotors and pads built for wet, salted, and cold conditions
- FAQ
- Sources
Essential tools and supplies you should have before you start
A seized rotor rarely needs exotic equipment, but having the right tools on the bench before you start saves time and prevents the kind of improvisation that damages studs or bearings. Gather everything first so you are not searching for a socket with one wheel off the ground.
- Penetrating oil, brake cleaner, and shop rags
- A socket set, impact driver, impact wrench, and breaker bar
- A soft-face hammer and a punch or drift
- A rotor or drum puller with forcing screws, plus ratchet straps
- A hub cleaning disc such as the 3M Roloc Pro brake hub cleaning disc or a comparable abrasive, and a wheel-hub brush
- A micrometer or caliper, and a torque wrench
- Gloves and eye protection
Pro Tip: Lay out your tools in the order you expect to use them. Working through a stuck rotor is far less frustrating when you are not hunting for the impact driver halfway through a step.
Stepwise methods from soak-and-tap to puller and heat
Work through these methods in order and stop as soon as the rotor comes free. Skipping straight to force is how studs get sheared and hubs get gouged.
- Soak and tap. Spray penetrating oil into the seam where the rotor meets the hub, then let it sit for 10 to 30 minutes. Manufacturer service guidance recommends giving a corrosion penetrant real dwell time between mating surfaces rather than reaching straight for a hammer, since adequate soak time can free a joint on its own.
- Deal with the retaining screws. Most rotors are held by one or two small screws. An impact driver with a properly seated bit will usually back these out; if a head is rounded or snapped, drilling or grinding it off is standard practice, since lug nuts, not these screws, provide the actual clamping force once the wheel is torqued down, as O’Reilly Auto Parts notes in its brake pad and rotor replacement guide.
- Work it with an impact wrench or breaker bar. With the screws out, alternate firm taps around the rotor’s hat with the hammer while working a breaker bar or impact wrench against the rotor from behind. The goal is to shock the rust bond evenly rather than pry at one spot.
- Bring in a rotor puller. Attach the puller’s legs or strap evenly around the rotor, centre the forcing screw on the hub, and tighten in small increments rather than cranking hard on one side. Leave one lug nut loosely threaded on a stud before you start: heavy-duty puller manufacturers specifically advise this so the rotor has something to catch it when it finally releases, according to OTC’s rotor puller guidance.
- Use heat only when the puller fails. A torch applied briefly and evenly to the hub, well away from the bearing seal, ABS sensor, or wiring, can help when rust has genuinely welded the rotor to the hub. This is a last step, not an early shortcut, because heat concentrated in the wrong spot can warp the hub or cook a seal.
Nearly all rounded or snapped rotor retaining screws get removed by tapping the head to shock it loose, soaking it in penetrant for about 15 minutes, then driving or drilling it out, according to Autrex’s brake pad replacement guide. That sequence mirrors the soak-and-tap approach for the rotor itself.
Once the rotor is off, check it against the decision point that matters most: measure thickness against the manufacturer’s minimum, and look for pitting or heat cracks. A rotor that fails either check gets replaced, not reinstalled.
When and how to use heavy-duty pullers and other advanced measures
Genuinely seized rotors, the kind that laugh off tapping and penetrant, call for a heavy-duty puller and a bit more patience. Choosing the right tool and rigging it correctly protects studs, bearings, and seals from damage that is expensive to undo.
- Pick a puller with enough spread and reach for your rotor diameter, and check that the forcing screw is hardened rather than a soft replacement part.
- Centre the forcing screw on the hub’s reinforced pilot area, not on the thin rotor hat, and tighten in small, even increments across all legs.
- Secure the puller’s legs with ratchet straps if the kit includes them, and leave a lug nut loosely in place to catch the rotor as it releases.
- If a strike cap is part of the puller’s design, light taps on the cap can help; otherwise steady, even torque is safer than hammering, since striking a puller not built for it risks cam-out or sudden failure.
- If the hub bearing assembly itself shows damage or the rotor has fused to a pressed hub, removing the hub assembly is often more practical than continuing to force the rotor.
Pro Tip: Tighten puller legs a little at a time, moving around the pattern rather than cranking one side fully before the next. Even pressure is what frees a rotor cleanly; uneven pressure is what bends a puller or snaps a stud.
Common mistakes at this stage include over-tightening one leg of the puller, striking a forcing screw not rated for impact, and ignoring a stud that is already showing thread damage, any of which can turn a stuck rotor into a bigger repair.
Cleaning the hub mating surface and inspecting rotors and hardware after removal
With the rotor off, the hub face is almost always covered in rust scale, and that scale is usually the root cause of the seizure in the first place. A Roloc-style hub cleaning disc removes that corrosion without gouging the metal or damaging wheel stud threads, which makes it a better choice than an aggressive wire wheel for this job. Guides on brake maintenance generally caution against wire brushes on delicate hardware for the same reason: they can chew into mating surfaces and leave filament debris behind.
- Run the cleaning disc over the hub face until bare metal shows evenly, then wipe it down with brake cleaner.
- Clean the wheel studs with a wire brush or thread chaser, but keep abrasives away from the brake caliper and friction surfaces.
- Measure rotor thickness with a caliper or micrometer and compare it against the stamped minimum.
- Check visually for heat cracks, deep grooves, or pitting across the friction surface.
- Replace any corroded clips, retaining screws, or bolts rather than reusing them.
Resurfacing only makes sense when the rotor still meets the manufacturer’s minimum thickness after machining; deep pitting, heat cracks, or marginal thickness mean replacement is the only safe option, as O’Reilly’s rotor resurfacing page explains. You can confirm what counts as a safe minimum for your specific rotor using the stamped minimum thickness as a measurement baseline.
Installation and maintenance steps to stop rotors from seizing again
Freeing a seized rotor once is a project. Doing it every winter is a pattern worth breaking, and most of the fix happens at reinstallation, not after the next seizure.
- Apply a light, high-temperature anti-seize to the hub pilot before mounting the new or cleaned rotor, keeping it well clear of the friction surface.
- Choose a semi-coated or GEOMET-coated rotor where corrosion resistance matters, particularly if the vehicle sees road salt or standing moisture.
- Torque lug nuts to the manufacturer’s spec in the correct star pattern rather than snugging them in a circle.
- In wet or salted conditions, check the rotor-to-hub joint periodically, and take a quick look after any period of long storage, since flash rust can set in within days of a car sitting still.
- Always replace sacrificial rotor retaining screws with new hardware rather than reusing corroded ones.
Pro Tip: A thin film of anti-seize on the hub pilot is one of the cheapest insurance policies in brake work. It takes under a minute and can save you a full afternoon with a puller next time.
A light coat of high-temperature anti-seize on the hub-to-rotor mating surface during installation is widely recommended as the most reliable way to prevent galvanic corrosion from welding the rotor to the hub again, particularly in climates with road salt or frequent moisture, according to Autrex’s installation guidance.

Practical guidance for keeping rotors from corroding in the first place
HydroAdaptive ceramic technology is designed to clear moisture from the friction surface so braking stays consistent in rain, snow, and humidity, which is also the environment that drives most rotor corrosion. A short checklist carries over directly from the installation steps above: clean the hub face to bare metal, apply anti-seize at the pilot only, and torque lug nuts to spec in the correct pattern.

For drivers dealing with road salt specifically, same-day steps to protect rotors from brine corrosion cover the maintenance habits that keep a hub from welding itself to a rotor over a single winter. Readers comparing coated rotor options can also look at how vane lean affects fit on directional rotors before buying a replacement set.
When DIY removal is reasonable and when to get professional help
A seized rotor is a reasonable DIY job when you have the tools listed above, a stable workspace, a helper to steady the puller or catch the rotor, and proper PPE. Heavy corrosion that has fused the hub, a stud already showing thread damage, or any sign the bearing or an ABS sensor could be in the way of heat changes the calculus. At that point, the risk of damaging a sealed bearing or wiring harness outweighs the cost of a shop visit, and stopping to call a professional is the safer call.
— AAA
Replacement rotors and pads built for wet, salted, and cold conditions
Once a seized rotor is off and scrapped, reinstalling with parts suited to your climate is the simplest way to avoid repeating the whole job next winter. SC Type Rotors use a semi-coated surface designed to resist the flash rust and corrosion that caused the original seizure, and GC Type Rotors add a GEOMET coating for extra protection against road salt and standing moisture.

Paired with a compatible pad set, these rotors work alongside HydroAdaptive ceramic friction material to clear moisture from the braking surface rather than letting it sit and corrode.
- Type 03 Brake Pads for HydroAdaptive+ ceramic friction in everyday conditions
- Type 07 Brake Pads for winter-ready performance in colder, wetter climates
- SC Type Rotors for semi-coated corrosion resistance
- GC Type Rotors for GEOMET-coated protection in heavier salt exposure
If you want a cleaner finish on the rest of the wheel while you are in there, Diamondbrite’s brake dust removal guide covers safe dwell times for cleaning the surfaces around the caliper and rim. Browse vehicle-specific kits on our brake pad and rotor pages to find a set matched to your make and model.
FAQ
How can I remove rust from my car’s rotors?
Spray penetrating oil onto the hub-to-rotor joint and let it sit for 10 to 30 minutes before tapping the rotor to break the bond. For surface rust on the hub face itself, a Roloc-style cleaning disc removes corrosion without gouging the metal.
Does O’Reilly still resurface rotors?
Yes, O’Reilly Auto Parts offers rotor resurfacing in store, but only when the rotor still meets the manufacturer’s minimum thickness after machining. Rotors with deep pitting, heat cracks, or marginal thickness are replaced instead.
Is it normal for a rotor to be loose?
A rotor should sit snugly against the hub once the wheel is torqued down, since the lug nuts provide the actual clamping force rather than the small retaining screws. Slight movement before the wheel is installed is normal, but looseness after full torque suggests a worn hub or incorrect installation.
How do I get rusted rotor screws off?
Tap the screw head to shock the rust loose, then soak it in penetrating oil for about 15 minutes before trying an impact driver. If the head is rounded or snaps off, drilling or grinding it out is a standard fix, since the screw is not what holds the rotor on once the wheel is mounted.
Sources
- How to Change Brake Pad & Rotors | O’Reilly Auto Parts
- Scotch-Brite™ Roloc™ Pro Brake Hub Cleaning Disc | 3M Canada
- Guide de remplacement des plaquettes de frein soi-même | Autrex
- OTC heavy duty brake drum and rotor puller product details