

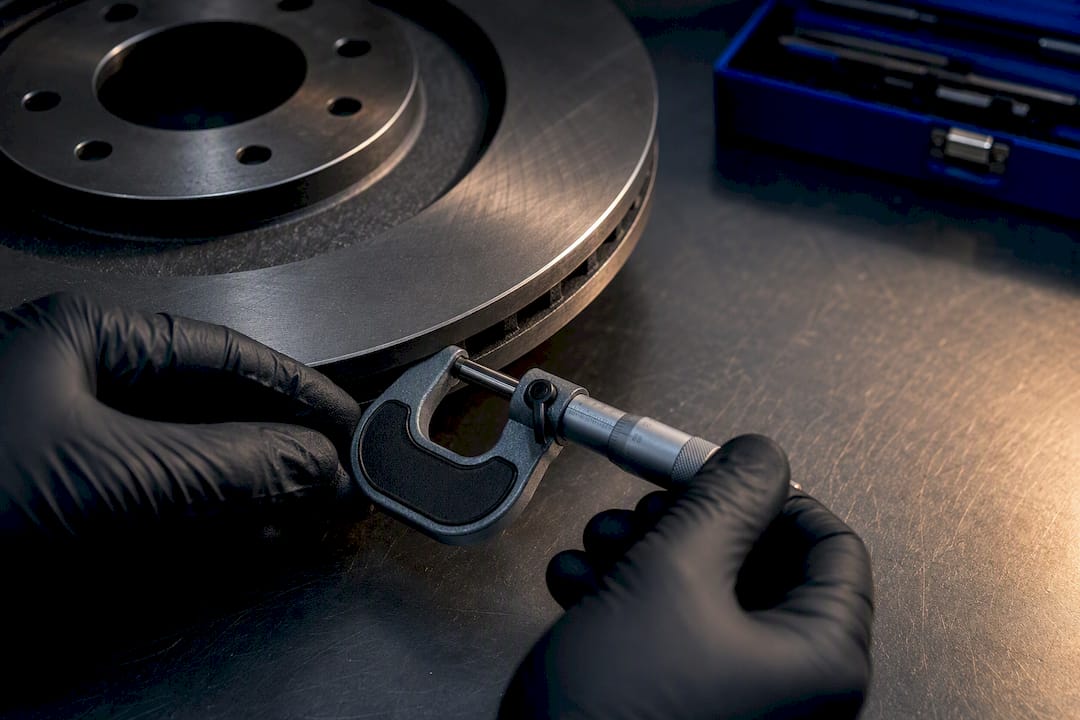
Rotor coatings protect the hat and vanes from corrosion, but the friction ring is a different story. Pad contact wipes coating away with normal use, and colour change, dark transfer, or patchy fading there are usually cosmetic. Real safety concerns are thickness below the stamped minimum, visible thermal cracks or hard oxide ridges that chew into pad material.
TL;DR:
- Coatings on the non-friction parts of rotors, such as the hat and edges, can last years, but those on the friction ring wear away almost immediately with normal use.
- The appearance of pad transfer, light rust, or subtle discoloration is typical and not a safety concern unless there are signs of excessive thickness loss, cracks, or deep pitting.
- Technologies like ceramic PEA coatings and FNC diffusion treatments provide high corrosion resistance, though their performance can vary depending on pad chemistry and operating temperatures.
- Inspections should measure rotor thickness against the stamped minimum and check for thermal cracks or uneven ridges, as cosmetic wear alone is generally harmless.
- Proper bedding, avoiding chloride exposure, and regular driving help coatings perform longer, while early chipping or peeling indicates application issues rather than normal wear.
Table of Contents
- What rotor coatings are and where they’re actually applied
- Reading the marks: pad transfer, heat rings and salt corrosion
- What coating technology actually survives braking heat
- How to check rotor wear and know when to machine or replace
- Habits and bedding that keep coatings performing longer
- How AAA Frictions applies OEM-aligned bedding and inspection practices
- Beyond eyeballing it: closer ways to check coating condition
- Chipping, peeling and other coating failures to watch for
- Judging coated rotors by function, not looks
- Coated rotors and pads built for consistent stops
- Sources
- FAQ
What rotor coatings are and where they’re actually applied
A rotor coating is a protective layer applied to a brake rotor to slow corrosion, improve appearance, and in some designs limit particulate release during braking. Most coatings are not meant to survive on the friction ring the same way they do on the hat, the vanes, or the outer edge. Pad contact during every stop wears away coating in the swept area almost immediately, which is expected rather than a flaw.
Manufacturers generally split coverage into two zones. Non-friction surfaces such as the hat, the web, and the outer edge keep their coating for years because pads never touch them. The friction track, where the pad actually contacts the rotor, is often left bare or thinly treated because a thick coating there would interfere with bedding and produce inconsistent pedal feel during break-in.
A few coating families show up across the industry:
- GEOMET-style metallic platings, applied mainly to hats and edges for strong corrosion resistance without affecting friction behaviour.
- Ceramic coatings using plasma electrolytic aluminating, known as PEA, which form an alumina-based layer that resists rust and, in vehicle testing, can develop a protective transfer layer as pad material bonds to it during use, according to SAE testing on PEA and FNC coatings.
- Diffusion treatments such as ferritic nitrocarburizing, or FNC, which infuse a nitrogen-rich layer into the surface rather than sitting on top of it, giving corrosion protection that survives even after the visible outer layer fades.
Each approach trades off differently between corrosion resistance, cost, and compatibility with the friction ring, which is why coated rotors from different brands can look and wear in noticeably different ways.
Reading the marks: pad transfer, heat rings and salt corrosion
Most of what looks alarming on a coated rotor is a byproduct of normal operation. Learning to separate cosmetic patterns from functional wear starts with understanding four things you’ll commonly see.
- The pad sweep effect. The exact area the pad rides on stays relatively clean and bright because friction removes rust as fast as it forms, while the narrow band above and below the pad’s contact path, never swept, discolours or rusts more visibly.
- Pad material transfer. Dark or black patches on the friction ring often mean pad material has bonded to the rotor surface, forming what’s sometimes called a secondary plateau. This is common under heavy braking and is not itself a defect.
- Salt-belt oxide ridges. In regions with heavy road salt, unswept zones can develop sintered oxide ridges that are unusually hard. Field reports document these ridges forming into abrasive rings capable of cutting into pad material and complicating resurfacing.
- Functional warning signs. Pitting, deep circumferential grooves, visible thermal cracks radiating from the hat, or thickness below the discard specification are not cosmetic and call for measurement, not guesswork.
One figure worth remembering: Ontario’s vehicle inspection standard requires rotor thickness to be measured and compared against the stamped or OEM minimum before a rotor is returned to service. A rotor below that number fails inspection regardless of how it looks.
Light surface rust after a rainy night or a stint in the garage typically clears within a few stops, a pattern covered in more detail in our guide to flash rust on rotors.
What coating technology actually survives braking heat
Coating choice matters more than most owners realize, and the differences show up clearly in lab and vehicle testing. PEA ceramic coatings form a hard alumina layer that resists corrosion well, and in vehicle tests, the coating can build a transfer layer from pad debris that further protects the surface from abrasive wear. That protective effect, however, depends heavily on which pad compound is riding against it, according to the SAE paper on PEA and FNC coating behaviour.
FNC treatments work differently. Rather than adding a layer on top of the iron, the process diffuses nitrogen into the surface itself. The visible white outer layer can fade with use, but the diffusion zone beneath it keeps providing corrosion resistance well after the coating stops looking new.
Metallic platings in the GEOMET family sit at the other end of the spectrum. They offer strong, dependable corrosion protection for hats, edges, and hardware, but they are not engineered to survive sustained friction-track temperatures, which is why you’ll rarely find them applied heavily across the swept area.
Pad chemistry changes the picture for all three. Research comparing semi-metallic, low-metallic, and NAO pad types has found that pad material affects transfer-layer chemistry and apparent corrosion resistance, meaning the same coated rotor can behave differently depending on what pad it’s paired with. Academic work at the University of Windsor is pushing PEA development further, aiming to reduce both corrosion and brake particulate emissions, a goal that matters more each year as EVs and emission-regulated fleets push for cleaner braking systems.
| Coating type | Primary protection zone | Strength | Trade-off |
|---|---|---|---|
| GEOMET-style plating | Hat, edges, hardware | High corrosion resistance | Not built for friction-track heat |
| PEA ceramic | Hat, vanes, some friction-ring use | High corrosion resistance, can form protective transfer layer | Performance varies with pad chemistry |
| FNC diffusion | Friction ring and hat | Retains protection after surface fades | Visible layer wears faster than the diffusion zone beneath |
How to check rotor wear and know when to machine or replace
A reliable inspection follows the same order every time: look, measure, then decide.
- Measure thickness at several points around the swept face using a micrometer, and record the lowest reading rather than an average.
- Compare that number to the stamped or OEM minimum thickness, which is the threshold Ontario’s inspection standard uses to fail a rotor.
- Check for ridges and pitting on the unswept zone. Light pitting with thickness well above minimum is usually cosmetic, while deep pitting or a raised ridge often means the surface needs machining or the rotor needs replacing.
- Inspect for thermal cracks, thin lines that radiate outward from the hat area or across the friction ring, which indicate the rotor has been overheated and should be replaced rather than resurfaced.
- Check runout with a dial indicator if the pedal pulses, since excessive runout can mimic the feel of a warped rotor even when thickness is fine.
- Do a simple tap test on any oxide ridge. A ridge that flakes off easily is likely surface rust, while one that resists a firm scrape may be the sintered, harder deposit associated with salt-belt corrosion.
Our guide to minimum rotor thickness measurement walks through the micrometer procedure in more detail, and our page on rotor pitting covers how to judge whether pitting alone is a safety issue.
Pro Tip: Keep a small note of your rotor’s stamped minimum thickness in your glovebox or phone, so any shop measurement gives you an instant answer instead of a guess.
Habits and bedding that keep coatings performing longer
Coating performance isn’t just about the coating itself. How a rotor is bedded, cleaned, and driven changes both its appearance and its working life.
- Bed new coated rotors properly. A short, OEM-aligned bedding cycle helps pad material transfer evenly rather than in patches, producing a cleaner look and steadier pedal feel from the start.
- Match pad chemistry to the rotor. Semi-metallic, low-metallic, and NAO pads all interact differently with coated surfaces, and the wrong pairing can accelerate apparent corrosion or uneven transfer, as covered in our piece on brake pad friction and pad chemistry.
- Avoid high-chloride wash water on rotors, especially before any machining work, since chloride exposure can worsen corrosion at the surface.
- Drive regularly rather than letting a vehicle sit. Light surface rust from humidity or salt spray typically wears off within the first few stops once the vehicle is back on the road.
- Prefer non-acid cleaners for wheels and rotors, since acidic wheel cleaners can degrade coatings faster than plain soap and water. A ceramic coating maintenance guide for alloy wheels covers similar principles that apply just as well to coated rotor surfaces.
Pro Tip: If a vehicle will sit for more than a few days, a short drive around the block afterward clears most flash rust before it has a chance to bond to the surface.
Discolouration from heat cycling is common on hard-driven vehicles and is explained further in our guide to brake pad temperature range.
How AAA Frictions applies OEM-aligned bedding and inspection practices
The pads and rotors are built around a ceramic friction system designed to clear moisture quickly so braking stays consistent in rain, snow, or humid conditions rather than fading in and out as water is cleared from the friction interface.
Our published bedding procedure follows a 10 to 15 minute, OEM-aligned process for coated rotors, intended to seat pad material evenly and produce a stable transfer layer before the vehicle sees regular driving. Following that sequence is one of the clearest ways to avoid the patchy, uneven cosmetic transfer that sometimes gets mistaken for a defect.
Our inspection guidance points owners toward the same basics covered above:
- Measure thickness at the thinnest point on the swept face, not just at a glance.
- Compare that reading against the rotor’s stamped minimum before deciding on machining or replacement.
- Treat hard, non-flaking ridges differently from light, friable surface rust.
The full step-by-step is available in our coated rotor bedding guide for anyone installing new coated rotors.
Beyond eyeballing it: closer ways to check coating condition
A visual check catches obvious problems, but it misses gradual wear that hasn’t yet produced a visible ridge or crack. Surface roughness measurement, using a profilometer to trace the friction ring, can reveal whether the surface has smoothed out in a way that reduces initial bite, or roughened unevenly in a way that points to uneven pad transfer.

Microscopy, including scanning electron microscopy paired with energy dispersive X-ray analysis, lets technicians and researchers see exactly what’s on the rotor surface at a microscopic level, distinguishing genuine coating loss from a thin layer of transferred pad material sitting on top of intact coating. This kind of SEM and EDX work is standard in the lab testing behind PEA and FNC coating research, where researchers need to confirm whether a coating has actually degraded or simply changed colour from surface deposits.
For most owners, these tools aren’t part of a driveway toolkit, but knowing they exist explains why a rotor that looks worn under a shop light might still measure well within spec, and why a rotor that looks fine can occasionally hide a thin patch of genuine coating loss. When a rotor’s history includes hard use, towing, or a known overheating event, a shop with access to surface roughness tools can settle the question with more certainty than eyesight alone.
Chipping, peeling and other coating failures to watch for
Coating failure looks different from ordinary wear. Chipping usually appears as small, sharp-edged patches where coating has broken away in flakes rather than wearing smoothly, often near the edge of the rotor or around mounting holes where the coating is thinner or more exposed to impact from road debris.

Peeling is broader, showing up as larger sheets lifting away from the base metal, typically a sign that the coating didn’t bond properly during manufacturing or that moisture got underneath the layer before it fully cured. Both patterns tend to appear early in a rotor’s life rather than developing gradually, which is a useful clue: if flaking shows up within the first few thousand kilometres, it points to a coating or application issue rather than normal wear.
The earliest sign of either failure mode is usually a small, isolated patch that looks out of place compared to the uniform fading elsewhere on the rotor. Catching it early matters because exposed base metal in a peeled or chipped area corrodes faster than the surrounding coated surface, and that localized corrosion can eventually turn into the pitting or ridging that does affect braking. A rotor showing early chipping or peeling is worth a second look at the next service interval, even if thickness and overall appearance still look fine. Our page on pad delamination and rust covers a related failure pattern on the pad side worth checking at the same time.
Judging coated rotors by function, not looks
The single most useful habit in this whole topic is a short, repeatable sequence: look at the rotor, measure it, then decide. Skipping straight from “that looks bad” to “replace it” wastes money on parts that are functionally fine, while skipping straight from “it looks okay” to “leave it alone” risks missing a rotor that’s actually below its safe minimum thickness.
Cosmetic concerns, discolouration, dark pad transfer, light surface rust, are real but rarely dangerous on their own. Safety concerns, thickness below the stamped minimum, thermal cracks, or hard abrasive ridges, are the ones that should drive a repair decision. An evidence-based approach, backed by an actual measurement rather than an impression under shop lighting, is the difference between a wasted repair bill and an informed choice.
— AAA
Coated rotors and pads built for consistent stops
If you’re weighing whether to resurface, replace, or simply keep driving on a coated rotor that passes its thickness check, the next practical step is choosing components that make future inspections easier rather than harder. The SC Type Rotors and GC Type Rotors pair GEOMET-style coating on non-friction surfaces with a friction ring designed for even pad transfer, while the Type 03 Brake Pads and Type 07 Brake Pads use technology to clear moisture quickly so braking stays consistent through rain, slush, and humid mornings.

For anyone installing new coated rotors, our coated rotor bedding guide walks through the same OEM-aligned process referenced above, so the transfer layer forms evenly from the first set of stops rather than patchily over the first few weeks. If you’re not sure which pad and rotor combination fits your vehicle, our page on choosing the right brake pads breaks down the decision by driving conditions and pad chemistry. Browse the SC Type Rotors or GC Type Rotors product pages to check fitment for your vehicle and see current kit options.
Sources
- Passenger/Light-Duty vehicle inspection standard (Ontario)
- Initial corrosion and wear behavior of brake rotors treated with PEA or FNC (SAE paper)
- University of Windsor research on rotor coating development
- Salt-belt rotor rust: machining and corrosion analysis
FAQ
How much wear is acceptable on rotors?
A rotor is acceptable as long as its thinnest measured point stays above the stamped or OEM minimum thickness, which is the threshold used in Ontario’s inspection standard. Cosmetic wear like discolouration or light surface rust doesn’t count against that measurement on its own.
How long will resurfaced rotors last?
Lifespan after resurfacing depends on how much material was removed and how close the rotor now sits to its minimum thickness, since a resurfaced rotor has less material left to wear through before hitting that limit. A rotor resurfaced close to minimum thickness will need replacement sooner than one with plenty of margin remaining.
What does it mean when a brake rotor is coated?
A coated rotor has a protective layer, commonly a ceramic PEA coating, an FNC diffusion treatment, or a GEOMET-style plating, applied mainly to the hat, vanes, and edges to resist corrosion. The friction ring often keeps little or none of that coating once normal pad contact begins, which is expected rather than a defect.
Do black coated rotors stay black?
Black or dark coated rotors usually keep their colour on the hat and vanes, since pads never touch those areas, but the friction ring will lighten, streak, or develop a transfer-layer sheen as pad material contacts the surface during normal driving. That change in the swept area is a normal cosmetic pattern rather than a sign the coating has failed.
One Response