

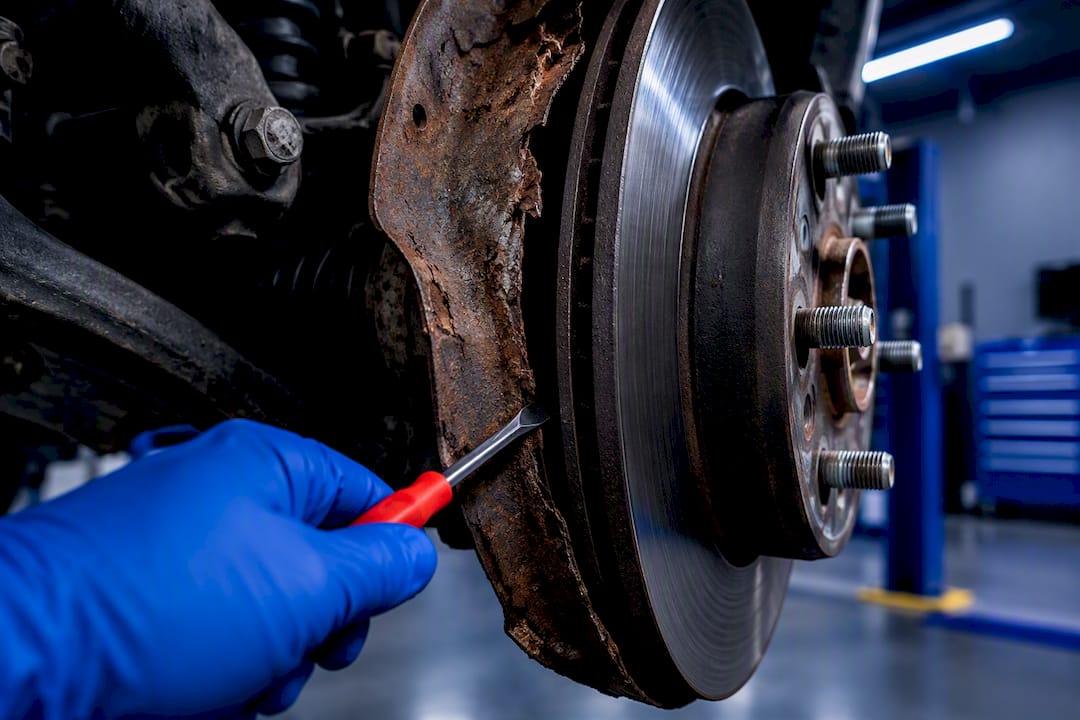
A rusted brake dust shield rarely stops your car outright, but it can turn into a real safety issue once it rubs the rotor, sheds flakes onto the pads, or lets contamination reach bearings and sensors. If you hear scraping that changes with wheel speed, stop driving and inspect the wheel, or have the vehicle towed to a shop. A quick visual check with the wheel off tells you almost everything you need to know.
TL;DR:
- Rusted brake dust shields often accelerate corrosion and debris contact, especially in winter climates with salt and moisture exposure, risking rotor and sensor damage.
- Visual signs of rust and damage include flaking metal, holes, and contact noises that vary with wheel speed, indicating a need for inspection or replacement.
- Temporary DIY fixes, like bending or tightening the shield, are viable only if the metal remains intact; severe corrosion requires full replacement by a professional.
- Regular maintenance, such as wheel-well cleaning and timely inspection during brake service, can prevent rust buildup and prolong shield longevity.
- Upgrading to corrosion-resistant rotors and advanced ceramic pads can mitigate ongoing rust issues and improve braking consistency in challenging weather conditions.
Table of Contents
- What is a brake dust shield and why does it matter for brake dust shield rust?
- How rust forms on dust shields and what causes it
- Symptoms that signal a rusted or damaged dust shield
- Quick DIY inspection and temporary fixes you can try safely
- Replacement options: repair, trim, or full swap, and what it costs
- When rusted shields signal a bigger safety problem
- Preventing dust shield rust: maintenance guidance from AAA Frictions
- Should you DIY the fix or call a mechanic?
- A practical upgrade if moisture keeps causing problems
- Sources
- FAQ
What is a brake dust shield and why does it matter for brake dust shield rust?
A brake dust shield is the thin metal plate mounted behind the rotor, between the wheel hub and the rotor face. Some shops call it a backing plate; others call it a splash panel. Whatever the name, it does the same job on almost every vehicle built in the last few decades.
The shield isn’t decorative. It blocks flying debris, cuts down how much road salt and moisture reach the caliper and hose, and helps direct cooling air across the rotor surface during hard braking. On many modern vehicles, it also shields the wiring and connectors for anti lock braking sensors mounted near the hub.
That protective role explains why manufacturers bother installing a part that never touches the friction surface. According to Professional Motor Mechanic, brake shields protect discs, pads, hoses, and electronic sensors from dirt, road salt, and sudden water splash that can otherwise warp rotors and speed up corrosion. Pull the shield off entirely, thinking it’s just adding weight or noise, and you remove that layer of defence.
Here’s what a healthy shield is doing for your braking system every time you drive through slush or a gravel lot:
- Deflecting stones, sand, and road debris away from the rotor and caliper
- Reducing direct contact between road salt and the rotor’s braking surface
- Channeling airflow to help cool the rotor during repeated stops
- Protecting ABS sensor wiring and connectors from grit and moisture
- Keeping splash and spray away from caliper seals and brake hoses
Removing a shield permanently, rather than repairing or replacing a damaged one, tends to backfire. YourMechanic notes that a missing shield lets more abrasive debris and salt reach the rotor and pads, which speeds up wear on both. If a shop pulls yours off during service, ask them to reinstall it, not leave it in the parts bin.
How rust forms on dust shields and what causes it
Rust on a dust shield starts as a chemical reaction, but the conditions that trigger it are entirely mechanical and environmental. Brake dust itself contains fine metallic particles shed from the pads and rotor. Once that dust settles on bare or scratched steel and gets wet, oxidation moves quickly, especially where road salt is already in the mix.
Winter driving accelerates the process more than almost anything else you’ll do to a vehicle. Willand Service Centre points out that repeated exposure to moisture and road salt is the leading cause of shield failure, and that over time the metal can flake and make contact with the rotor, producing thumping or rattling noises that force a repair.
Physical damage compounds the corrosion problem. A curb strike, a pothole impact, or a shield bent slightly during a routine brake job can crack a protective coating or expose raw metal. Once that coating is broken, rust spreads from that single point outward, often faster than it would on an untouched panel.
Common accelerators of dust shield rust:
- Road salt combined with slush, especially on vehicles driven through winter months
- Standing moisture in wheel wells that never fully dries between drives
- Curb strikes or pothole impacts that chip protective coatings
- Shields bent slightly out of position during a prior brake or tire service
- Age and mileage, since stamped steel shields on older vehicles have often gone years without inspection
Statistic Callout: In colder climates, salt and splash cycles make dust shields one of the more frequent corrosion casualties on older vehicles, according to Willand Service Centre, which recommends regular wheel-well cleaning to extend shield life.
Material choice plays a role too. Most factory shields are stamped steel, chosen for cost and manufacturability rather than corrosion resistance. Aluminium shields resist rust far better but show up mainly on higher-end trims. Coated backing plates, whether powder-coated or treated with a corrosion-resistant finish, last noticeably longer than bare stamped steel in the same climate.
Symptoms that signal a rusted or damaged dust shield
The clearest sign of a failing shield is noise that changes with wheel speed rather than staying constant. A scraping or grinding sound that gets faster as you accelerate and slower as you brake to a stop, but never fully disappears, usually points to metal touching metal somewhere near the rotor.
FleetDoc explains that a bent, corroded, or damaged dust shield often produces exactly this kind of metal scraping noise, one that varies with wheel speed. Minor cases respond to a simple adjustment, but severe corrosion usually calls for replacement rather than a bend-back fix.
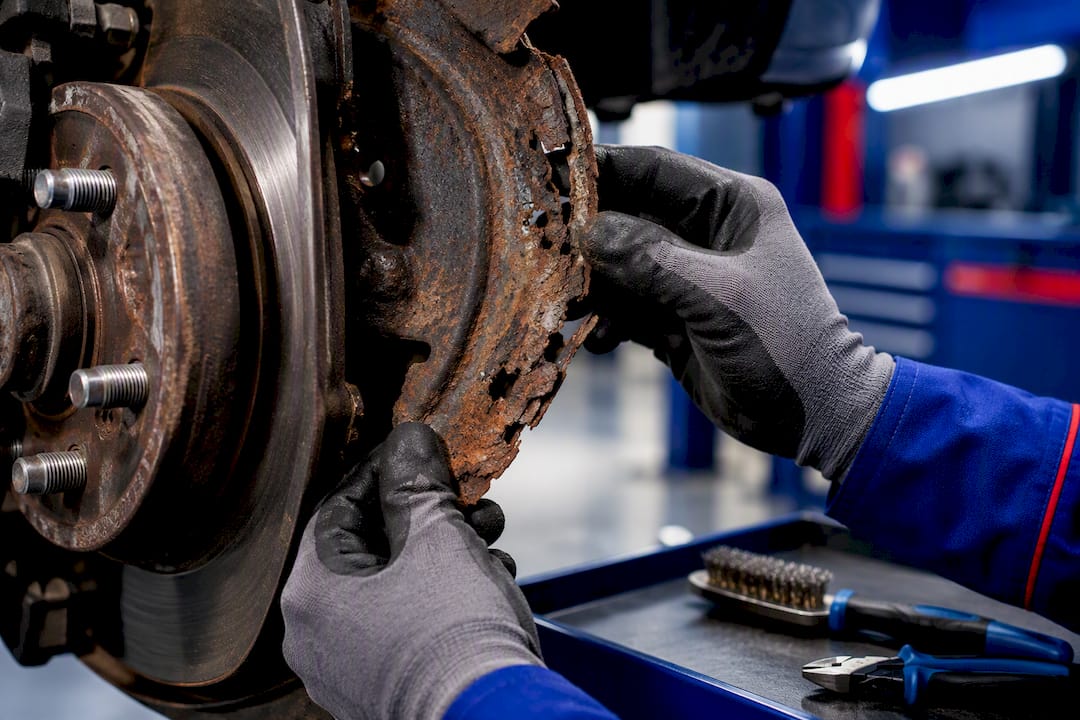
Visually, look for holes rusted straight through the metal, flaking or crumbling edges, a lip bent inward toward the rotor, or mounting bolts that have rattled loose or gone missing entirely. Any of these can let the shield migrate toward the spinning rotor over time.
The table below breaks down how shield-related symptoms differ from other common brake complaints, since the fixes are completely different.
| Symptom | Likely cause | Changes with |
|---|---|---|
| Scraping that speeds up and slows with the wheel | Bent or rusted shield contacting rotor | Wheel speed, not brake pedal pressure |
| Grinding only when the brake pedal is pressed | Worn-out pads or a caliper issue | Brake application, not wheel speed alone |
| Rhythmic thumping or rattling | Rust flakes loose inside the wheel well hitting the rotor or shield | Wheel speed, sometimes worse over bumps |
| Grinding humming that grows with speed, regardless of braking | Failing wheel bearing | Speed, present with or without braking |
| Squeal only on the first stop of the day | Surface rust on the rotor face, not the shield | Clears after a few light stops |
Differential diagnosis comes down to timing. Shield noise tracks wheel rotation. Pad wear noise tracks pedal pressure. Bearing noise shows up at speed whether you’re braking or not, and often changes pitch when you turn the steering wheel left or right, since that shifts load on the bearing.
Quick DIY inspection and temporary fixes you can try safely
A wheel-off inspection takes most DIY enthusiasts under thirty minutes per corner and tells you almost immediately whether you’re dealing with a minor bend or serious corrosion.
Before you touch anything, work through this safety checklist:
- Park on level, solid ground and set the parking brake before you loosen any wheel.
- Chock the wheels on the opposite end of the vehicle so it can’t roll while you’re underneath.
- Use a proper floor jack to lift the corner, then support the vehicle on jack stands rated for its weight. Never work on a wheel supported only by a jack.
- Wear eye protection before you start wire-brushing rust or prying at metal near your face.
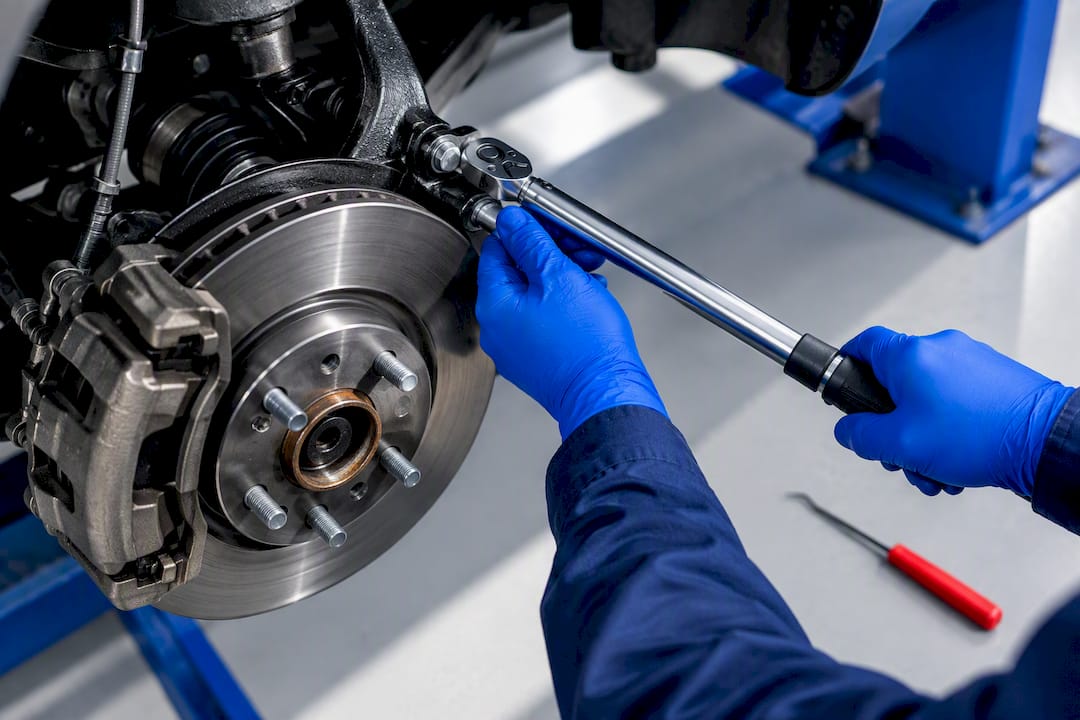
- Look up your vehicle’s factory torque specs for lug nuts and any caliper or bracket bolts before you start, since overtightening can warp a rotor and undertightening risks a wheel coming loose.
Once the vehicle is safely supported and the wheel is off, spin the rotor by hand. Watch and listen for any point where the shield makes contact. Inspect the shield’s inner edge closely, the part closest to the rotor, since that’s where rubbing damage concentrates. Check every mounting bolt or clip to confirm nothing has backed out or sheared off.
If you find the shield making light contact but it’s otherwise structurally sound, a few temporary fixes buy you time:
- Clear any trapped debris, small stones, or built-up brake dust caked between the shield and rotor.
- Tighten any loose mounting bolts back to factory torque spec.
- Gently bend the shield’s lip away from the rotor using needle-nose pliers, or tap it back with a hammer against a block of wood for support.
- Use a wire brush to knock loose surface rust and flaking scale before deciding whether the shield is salvageable.
Car Tire Reviews notes that repositioning or gently bending a shield away from the rotor is a common, low-cost fix, but any shield that crumbles or cracks when you bend it has gone past the point of a bend-back repair and needs replacing.
Pro Tip: Keep a small notepad or phone photo of exactly where the shield was rubbing before you bend it back. If the noise returns in a few weeks, that reference point saves you from redoing the entire diagnosis from scratch.
DIY fixes have real limits. If the metal flakes apart in your hands, crumbles at the edges, or the rust has eaten through to visible holes, bending it back won’t hold. At that point you’re looking at a replacement shield, and if you’re not confident pulling a caliper or dealing with wheel bearing preload, that’s the moment to hand the job to a mechanic instead of forcing it.
Replacement options: repair, trim, or full swap, and what it costs
Small bends and minor tears near the shield’s outer edge are usually fine to trim or bend back, especially on a shield that’s otherwise solid and rust-free everywhere else. Once corrosion has spread across a wide section, or metal starts flaking off in chunks, trimming just delays the inevitable and the shield needs full replacement.
Replacing a shield typically means pulling the wheel and caliper, and on some vehicles the rotor as well, since the shield sits behind it on the hub. That part of the job is straightforward on paper, but seized fasteners after years of rust exposure can turn a thirty minute task into an hour of penetrating oil and patience.
Cost varies more than most people expect, and not just by vehicle make. PartCatalog notes that DIY replacement can save on labour but may still take two to four hours per wheel depending on how badly the fasteners have seized, while professional replacement costs vary widely by vehicle and region since labour rates and parts sourcing differ so much shop to shop.
A few things push the estimate up or down:
- Whether the wheel bolts and caliper bracket bolts come off cleanly or need cutting and replacing
- OEM versus aftermarket shield pricing, which can differ significantly depending on the vehicle
- Whether the rotor needs to come off too, adding labour time even if the rotor itself is fine
- Regional labour rates, which vary more between shops than most parts prices do
Some aftermarket shields use a split design that bolts on in two pieces rather than requiring full axle or hub removal. Dorman’s split-shield design is one example of that approach, and it can meaningfully cut installation time compared to a single-piece OEM shield on vehicles where axle removal would otherwise be necessary.
If you’re doing this yourself, budget for a torque wrench, penetrating oil, a wire brush, and patience for seized bolts. Whatever you do, don’t skip the final torque check on caliper bolts and wheel bearing hardware. Wheel bearing preload specs exist for a reason, and getting them wrong creates a new problem worse than the one you just fixed.
When rusted shields signal a bigger safety problem
Not every rusted shield is urgent, but three specific situations move this from a maintenance item to a stop-driving problem.
Flaking metal that’s already making contact with the rotor or getting caught between the pad and rotor face needs immediate attention. That contact wears unevenly, and depending on how the flake sits, it can score the rotor surface on every rotation.
Watch for these escalation signs:
- Rotor pitting or visible scoring, which usually means resurfacing or full replacement of the rotor rather than just the shield
- Uneven pad wear across one side of the vehicle, suggesting debris or heat has been affecting one corner differently than the others
- Grinding or humming that persists at speed regardless of braking, a sign contamination may have reached the wheel bearing
- ABS warning lights or erratic sensor readings, which can point to rust or debris interfering with sensor wiring near the hub
Bearing contamination is the most time-sensitive of these. Rust flakes and grit that work their way past a damaged shield can accelerate bearing wear, and a failing bearing on the highway is a genuinely different risk category than a noisy shield. If you notice a grinding hum that doesn’t change when you press the brake pedal but does shift pitch when you turn the wheel, get that inspected before you drive much further.
Preventing dust shield rust: maintenance guidance from AAA Frictions
Most shield failures we see stem from the same pattern: months of untouched road salt sitting against bare metal in a wheel well nobody ever looks at. The fix is less about product and more about habit.
A few practices go a long way toward extending shield life:
- Rinse wheel wells and the underside of the vehicle after driving through salted roads, especially in late winter when salt concentration is highest
- Ask your shop to inspect shield clearance and mounting bolts every time pads or rotors get serviced, since that’s when the wheel is already off
- Address small rust spots with a wire brush and a rust-inhibiting spray before they spread across the whole panel
- Check for grinding or scraping noise after any pothole hit or curb strike, since those impacts can bend a shield without leaving obvious visible damage
Corrosion-resistant coatings on rotors and calipers reduce how much moisture and salt exposure the whole braking assembly deals with over a season, which indirectly protects the shield too by cutting down the debris and grit cycling through the wheel well. If flaking pads are part of what’s contaminating your rotor and shield, our guide on pad delamination and rust walks through when that’s a safe-to-drive situation and when it isn’t. For winter-specific brake dust buildup, see how HydroAdaptive pads handle winter conditions without letting dust accumulate into a rust-feeding layer.
Should you DIY the fix or call a mechanic?
If you’re looking at flaking metal already touching the rotor, or you don’t have confidence working around wheel bearing preload, hand this one to a mechanic. The margin for error with bearing torque specs is small, and getting it wrong creates a worse problem than the rust you started with.
A simple bend, some trapped debris, or a loose mounting bolt is a different story. If you’ve got jack stands, a torque wrench, and the patience to look up factory specs before you start, that’s well within reach for a confident DIY enthusiast.
Whichever route you take, don’t skip the test drive afterward. Listen for the noise at low speed in an empty lot before you trust the repair on the highway, and double check every bolt you touched against the torque spec you started with.
— AAA
A practical upgrade if moisture keeps causing problems
Fixing or replacing a rusted shield solves the shield problem, but if flash rust and wet-weather inconsistency keep showing up on your rotors even after the shield is sound, that’s usually a sign the braking system itself needs help managing moisture, not just the shield around it.

Certain manufacturers have developed ceramic pads with technology designed to address that gap. Some standard ceramic pads can develop delayed response and inconsistent pedal feel in rain, humidity, or after a car sits overnight in cold weather; advanced ceramic pad technologies are designed to clear moisture rapidly and hold consistent friction across those conditions. Pair that with corrosion-resistant rotors, like the SC Type Rotors, and you’re addressing the flash-rust cycle that eats away at bare steel components, shields included, season after season.
This isn’t a replacement for fixing a damaged shield. It’s a sensible next step if you’ve replaced the shield, kept up with cleaning, and you’re still seeing rotor pitting or flash rust show up faster than it should. Browse the Type 03 Brake Pads or the full GC Type Rotors lineup to see which combination fits your vehicle, and check current pricing directly on the product page before your next brake service.
Sources
For readers who want to go deeper on specific symptoms or part sourcing, a few resources stand out. Owner forum threads, like this Subaru Outback discussion on rear splash guards, document real cases where shield rust went unnoticed until a rotor swap revealed it, useful for understanding how easily this gets missed during routine service.
For cleaning and prevention between brake jobs, Diamondbrite’s guide to safe brake dust removal covers dwell times and technique that help slow the corrosion cycle before it starts. If you’re troubleshooting rubbing near the rotor and want to understand clearance measurements more broadly, Wheel Light Express’s breakdown of caliper clearance offers useful context, even though it’s written for a different accessory.
On the AAA Frictions site, the rotor pitting guide and pad delamination article both connect directly to symptoms covered here.
- Serve and protect – Professional Motor Mechanic
- Brake dust shield replacement Peterborough – Causes, Warning Signs & Expert Advice
FAQ
Are brake dust shields necessary?
Yes. They block debris and road salt from reaching the rotor, caliper, and ABS sensor wiring, and removing them permanently speeds up wear on the pads and rotor by exposing them to more grit and moisture.
Can you drive with a bad brake dust shield?
It depends on the damage. A shield with surface rust but no contact with the rotor is generally safe to drive on short term, but one that’s rubbing, flaking, or has migrated close to the rotor should be inspected before you drive further, since contact can score the rotor or worsen with every rotation.
How much does it cost to replace a brake dust shield?
Parts and labour vary by vehicle and by how seized the mounting fasteners have become. DIY replacement can take two to four hours per wheel, and professional shop pricing depends heavily on your specific vehicle and region, so it’s worth getting a quote from a local shop for an accurate number.
Is it okay to remove a brake dust shield?
Removing it permanently isn’t recommended, since it leaves the rotor, pads, and caliper more exposed to salt, moisture, and debris. If a shield is too damaged to repair, replacing it, rather than leaving it off, protects the rest of the braking system over the long run.