

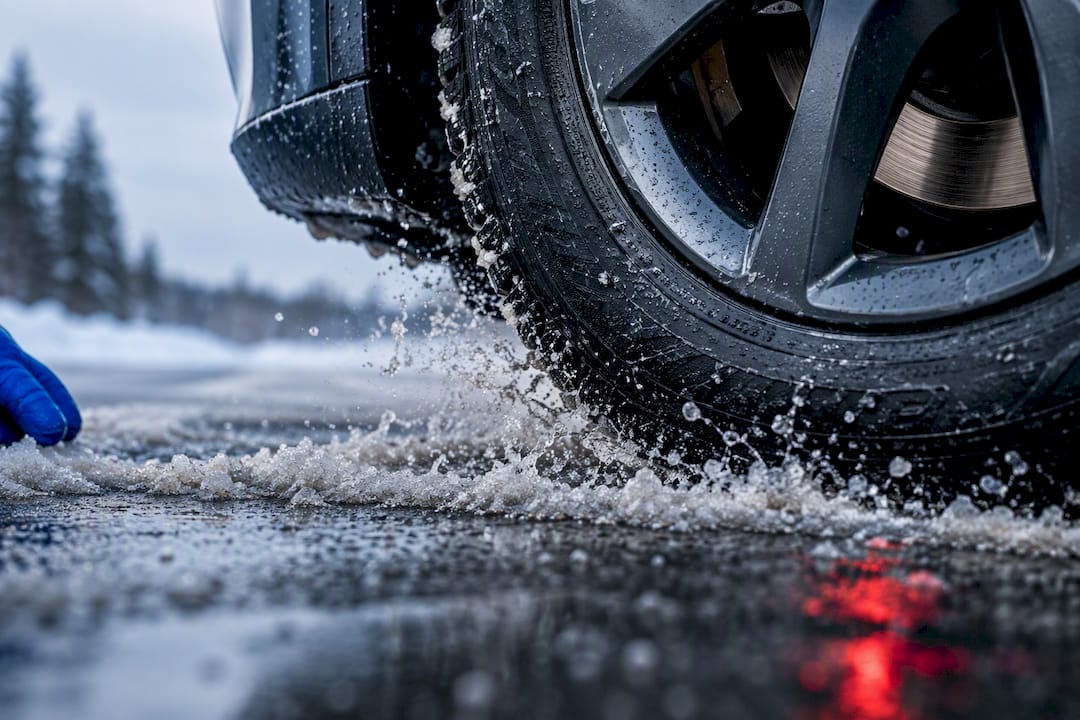
The most reliable winter braking comes from matched, moisture-adaptive ceramic pads paired with corrosion-resistant rotors, not from any single part bought in isolation. We recommend HydroAdaptive-formulated components, like those AAA Frictions builds, precisely because they clear moisture fast and hold friction steady. Before the cold sets in, check your brake fluid condition, pad thickness, rotor surface, and pedal feel.
TL;DR:
- Matched, corrosion-resistant ceramic pads with moisture-adaptive technology reduce winter braking distance by quickly clearing water from the interface and maintaining steady friction.
- Moisture absorption during cold nights can temporarily lower brake pad friction, surface rust on rotors reduces initial bite, and contaminated fluid can cause a soft pedal on long descents, all increasing stopping distance.
- Pre-season checks should include pad thickness, rotor condition, caliper function, brake fluid quality, and pedal feel to avoid surprises on icy roads.
- Using a full kit of matched pads, rotors, and hardware designed for winter conditions ensures predictable braking performance and resists corrosion from road salt.
- Installing components early and properly bedding them in shortens break-in time and ensures safe braking reliability throughout winter conditions.
Table of Contents
- Why winter-ready brakes matter for winter tires and brakes
- The science of moisture-adaptive friction: what actually changes at the pad interface
- What should you check before winter driving season?
- How do you choose matched pads and rotors for winter?
- How do you verify your winter brakes are working after an upgrade?
- Cost considerations for winter tire and brake upgrades
- Typical timeline for selecting and installing winter tires and brake components
- Author perspective: why moisture-adaptive brakes are worth the investment this winter
- How AAA Frictions can help you get ready for winter
- Sources
- FAQ
Why winter-ready brakes matter for winter tires and brakes
Cold and moisture change how a brake pad behaves at the exact moment you need it most: the first hard stop after your car has sat overnight. Pads absorb ambient moisture during sorption, and that moisture measurably lowers the friction coefficient until the pad heats up and releases it again during the early stops of a drive, a pattern documented in SAE research on copper-free brake pads. That is the physical reason a pedal can feel a touch soft on a frosty morning and firm up two kilometres later.
Rotors face a parallel problem. A thin film of surface rust forms on exposed rotor faces after a humid night or a slushy commute, and that film briefly reduces the initial bite until the pad scrubs it away.
Brake fluid adds a third variable. Moisture-contaminated fluid thickens in cold weather and boils at a lower temperature under heavy use, which can translate into a spongier pedal on a long winter descent.
Each of these effects is small on its own. Stacked together, on a slick road with less traction to spare, they add real distance to your stop.
- Moisture in the pad lowers friction coefficient until the pad warms and desorbs it
- Surface rust on rotors briefly reduces bite on the first one or two stops
- Contaminated fluid raises the risk of a spongy pedal under sustained heavy braking
- Transport Canada’s winter-driving guidance recommends extra following distance specifically because stopping distances increase in winter
Statistic callout: Humidity alone has been shown to measurably shift pad hardness, dimensions, friction, and wear rate, which is why a widely cited SAE humidity study insists on controlled humidity for any brake test meant to be repeatable.
The science of moisture-adaptive friction: what actually changes at the pad interface
Moisture does not just sit on top of a brake pad. It works its way into the pad’s pore structure over hours or days, a process researchers call sorption, and it changes the pad’s dynamic modulus along with its friction coefficient. As the pad heats during driving, it desorbs that moisture, and friction typically climbs through the first several stops rather than staying flat from the very first press.
Two other variables complicate this further. Hydrophobicity, meaning how strongly a compound resists absorbing water in the first place, determines how much moisture a pad picks up overnight. Velocity dependence matters too: friction coefficient at low speed behaves differently than at highway speed, and that gap widens when moisture is present, according to research on semimet and NAO pad compression behaviour.
This is also why the friction number on a virgin, never-driven pad’s spec sheet tells you less than you’d expect. Service conditions, meaning real humidity, real temperature swings, and real heat cycling, shape performance far more than a lab number measured once under ideal conditions. Our brake pad friction and mu behaviour guide walks through why test-code numbers and daily driving numbers diverge.
HydroAdaptive formulation targets this exact gap. Rather than treating moisture as a variable to tolerate, it’s engineered to clear water from the sliding interface quickly, which shortens the desorption window and keeps friction closer to consistent from the very first stop rather than the fifth.
- Moisture sorption lowers friction until heat drives it back out of the pad
- Hydrophobic compounds absorb less moisture overnight to begin with
- Low-speed friction is the most sensitive to moisture, which matters most in stop-and-go winter traffic
- Virgin pad specs rarely predict real cold-weather behaviour
Pro Tip: If your current pads feel noticeably softer on the very first stop of the day compared to the tenth, that gap is a moisture signature, not a defect. It’s one of the clearest signs a moisture-adaptive compound would serve you better than a standard ceramic pad.
What should you check before winter driving season?
A short inspection now beats a surprise on an icy on-ramp later. Work through these checks before temperatures drop, and repeat the in-vehicle tests periodically through the season.
- Pad thickness. Worn pads with very little remaining material need replacement before winter, not after the first snowfall.
- Rotor condition. Look for runout, thickness variation, deep grooves, or a rusted band that doesn’t clean off with light braking.
- Caliper mobility and hardware. Sticky slide pins or corroded clips cause uneven pad wear and pull under braking.
- Brake fluid. Fluid older than two to three years, or fluid that looks dark or cloudy, should be flushed, since contaminated fluid thickens in cold and boils sooner under heavy use.
- Pedal feel from the driver’s seat. Note travel distance, firmness after the first few stops, any vibration through the steering wheel, and any new noise.
Quick remedies handle most of what you’ll find: flush old fluid, drive a few kilometres to burn off a light rotor film, and wash road salt and grit off the wheels regularly since salt accelerates rotor corrosion. If a soft pedal doesn’t firm up after a few stops, if you hear persistent grinding, or if a warning light stays on, stop troubleshooting yourself and get a technician to look at it.
Pro Tip: Kwik Kar’s brake service checklist is a useful second reference if you want a mechanic’s-eye view of which symptoms warrant an appointment versus which ones are cosmetic.
How do you choose matched pads and rotors for winter?
Buying a pad from one line and a rotor from another is the single most common mistake we see drivers make before winter. Friction materials are engineered against a specific rotor surface and hardware set, and mismatched components introduce variability right when you need predictability most, a pattern shop experience with cold-weather braking confirms repeatedly: matched pads and rotors with corrosion-resistant coatings measurably reduce the inconsistency salt and surface rust otherwise cause.
Four things matter more than brand loyalty when you’re shopping for a winter-ready kit:
- Moisture-adaptive ceramic compound in the pad itself, not just a ceramic label
- Rotor coatings that resist corrosion, since a bare rotor left overnight in slush starts rusting within hours
- Correct backing plate and hardware matched to your specific caliper, not a universal fit
- Vehicle-specific fitment, confirmed against your exact year, make, and model before you order
Our winter brake upgrade guide walks through how to match pads, rotors, and hardware as a set rather than piecing components together. In practice, this points toward a full front or rear kit rather than a pad-only order. AAA Frictions’ Type 03 and Type 07 pad lines are built around HydroAdaptive ceramic formulation, and they’re designed to pair with SC Type semi-coated rotors or GC Type GEOMET-coated rotors depending on your corrosion exposure. If you’re not confident diagnosing fitment or torque specs yourself, professional installation is worth the cost on a winter brake job specifically, since a poorly seated pad undercuts even the best friction material.
How do you verify your winter brakes are working after an upgrade?
New components need a short break-in period before they perform at their best, and testing them properly tells you early if something’s wrong.
- Find a quiet, low-traffic stretch of road and make five to six moderate stops from a low speed, letting the brakes cool briefly between each.
- Pay attention to pedal behaviour across those stops: bite should become more consistent, not less, as the pads warm through their bedding cycle.
- Listen for grinding or squealing and watch for steering wheel vibration, which usually signals a rotor issue rather than a pad issue.
- If ABS activates unexpectedly on dry pavement, or the pedal stays inconsistent past the sixth stop, stop and re-check hardware torque and rotor surface before driving further.
Correct behaviour looks like this: bite firms up steadily, no judder develops, and noise fades as the surfaces mate. Anything else warrants a second look before you trust the car with real winter traffic. Remember that even a flawless brake upgrade can’t overcome physics on ice, since ABS and stability systems behave differently on slippery surfaces than on dry pavement, and controlled, gentler braking still matters most when traction is limited.
Cost considerations for winter tire and brake upgrades
Budgeting for a winter brake upgrade means thinking in kits, not parts. A pad-only replacement is the cheapest route upfront, but pairing worn pads with old, rusted rotors usually shortens the life of both and reintroduces the inconsistency you were trying to fix. A matched front or rear kit, meaning pads, rotors, and hardware bought together, tends to cost more at checkout but avoids the false economy of replacing rotors again in a year because they were mismatched to a new pad compound.
Installation is the other variable. A confident home mechanic with the right tools can install a kit themselves and save on labour, but torque specs and caliper bracket alignment matter enough on a winter job that many drivers choose professional installation for peace of mind, particularly if the vehicle sees heavy salt exposure.
Corrosion protection is worth factoring in too. GEOMET-coated rotors and semi-coated rotor options cost a bit more than an uncoated rotor, but they resist the surface rust that road salt causes, which reduces the odds of an early comeback repair. A product like rust-inhibiting undercoating applied to nearby hardware and lines can extend that protection further, particularly in regions that salt heavily through the winter months.
The honest way to think about it: a moisture-adaptive kit costs more than the cheapest pad on the shelf, but it’s priced against fewer winter comebacks, not against the sticker on a basic ceramic pad.
Typical timeline for selecting and installing winter tires and brake components
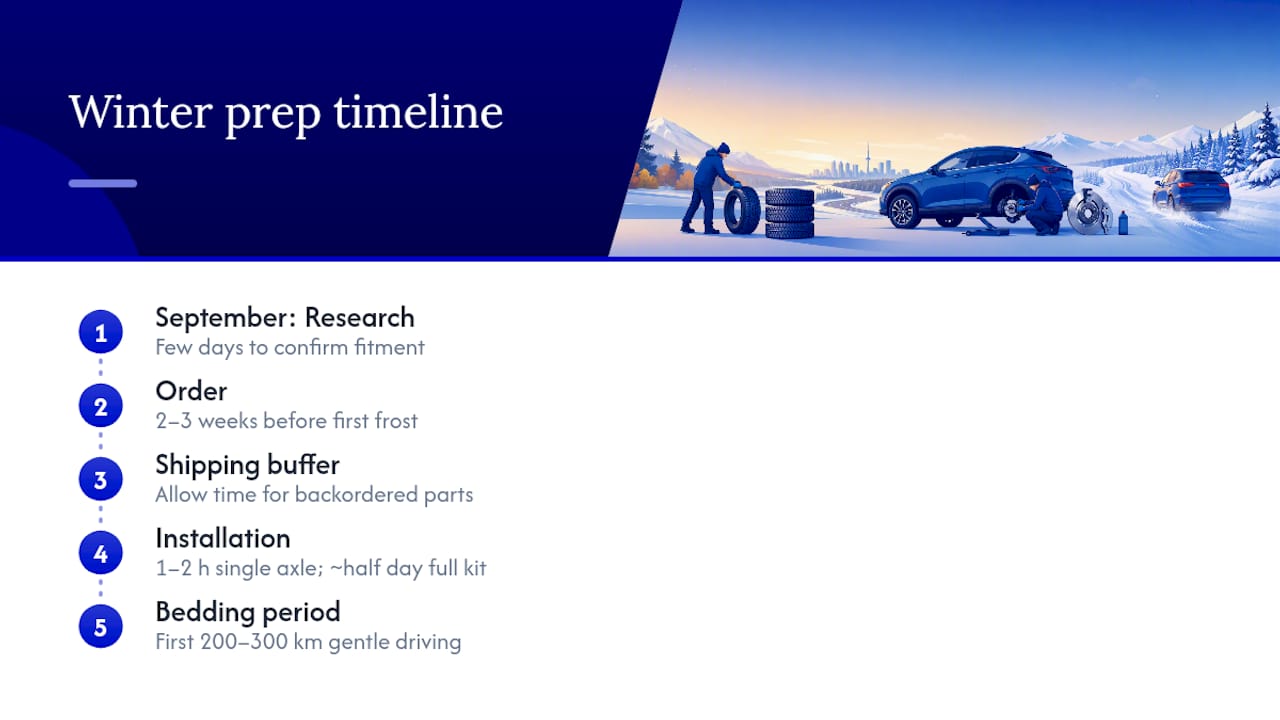
Most drivers leave this too late, which is why late October and early November are the busiest weeks of the year for brake shops. Starting the process in September gives you room to research fitment, compare kit options, and book an installation slot before the rush.
A realistic timeline looks like this: allow a few days to research and confirm vehicle-specific fitment against your exact year, make, and model, since a mismatched rotor diameter or pad shape is the most common ordering mistake. Online orders for pads and rotors typically ship within a few business days, so ordering two to three weeks before you expect the first hard frost gives comfortable buffer room for shipping and any backordered parts.
Installation itself, once parts are in hand, takes most shops one to two hours for a single axle and closer to half a day for a full front and rear kit, depending on whether other components need attention. If you’re installing yourself, budget an afternoon and factor in a bedding period afterward, roughly the first 200 to 300 kilometres of gentle driving, before you rely on full braking performance in genuinely icy conditions.
The practical rule: treat late summer and early fall as your window, not the first snowfall. By the time roads are slick, shop bays are booked solid and parts availability tightens.
Author perspective: why moisture-adaptive brakes are worth the investment this winter
The evidence here is consistent across every source we reviewed: moisture changes friction behaviour in ways a spec sheet won’t show you, and that gap shows up exactly when you can least afford it, on the first cold stop of the day. We think matched HydroAdaptive kits address that gap directly rather than papering over it with a thicker pad or a bigger rotor. Buying the right compound matters, but so does installing it correctly and matching every component in the kit. Skip either step and you’ve spent money without solving the actual problem.
— AAA
How AAA Frictions can help you get ready for winter
Most winter brake problems trace back to one thing: components that were never designed to handle moisture at the sliding interface in the first place. AAA Frictions builds around HydroAdaptive ceramic technology specifically because it clears water fast and holds friction steady, so you’re not troubleshooting a soft pedal on the coldest morning of the year.

Start by confirming fitment for your exact vehicle on the Type 03 or Type 07 pad pages, then pair your choice with SC Type or GC Type rotors depending on how much road salt your region sees. If you’re unsure which pad and rotor pairing suits your driving, the HydroAdaptive formulation page breaks down the technology behind each line. Decide whether you’re installing the kit yourself or booking a shop, order with enough lead time to avoid the fall rush, and you’ll head into winter with brakes that behave the same on the first stop as the fiftieth.
Sources
- A Study of Moisture Sorption-Desorption and Its Influence on the Dynamic Modulus and Friction Coefficient of Copper-Free Brake Pads
- Stay safe when driving: driving safely in winter
- How does temperature impact brake performance on cold Canadian roads?
FAQ
Why do my brakes feel weaker on cold mornings?
Cold pads absorb ambient moisture overnight, and that moisture temporarily lowers the friction coefficient until the pad heats up and releases it during your first few stops, a pattern confirmed in SAE moisture sorption research. A light film of rotor rust from overnight parking adds to the effect.
Should I replace pads and rotors together for winter?
Yes, in most cases. Mismatched pads and rotors introduce variability that’s worse in cold and wet conditions, and shop experience shows matched components with corrosion-resistant coatings reduce that inconsistency meaningfully.
What makes AAA Frictions pads different for winter driving?
AAA Frictions’ Type 03 and Type 07 pads use HydroAdaptive ceramic formulation, engineered to clear moisture from the pad-rotor interface quickly rather than letting it accumulate. Pricing for both lines is listed on the Type 03 and Type 07 product pages.
Can I rely on ABS instead of upgrading my brakes?
No. ABS and stability control help you maintain steering control while braking hard, but they can’t overcome low traction on ice, and Transport Canada’s guidance still recommends extra following distance and controlled braking technique regardless of your equipment.
How often should brake fluid be flushed for winter?
Most manufacturers recommend flushing brake fluid every two to three years, since it absorbs moisture over time that lowers its boiling point and thickens it in cold weather. If your fluid looks dark or cloudy, flush it before winter rather than waiting for the scheduled interval.