

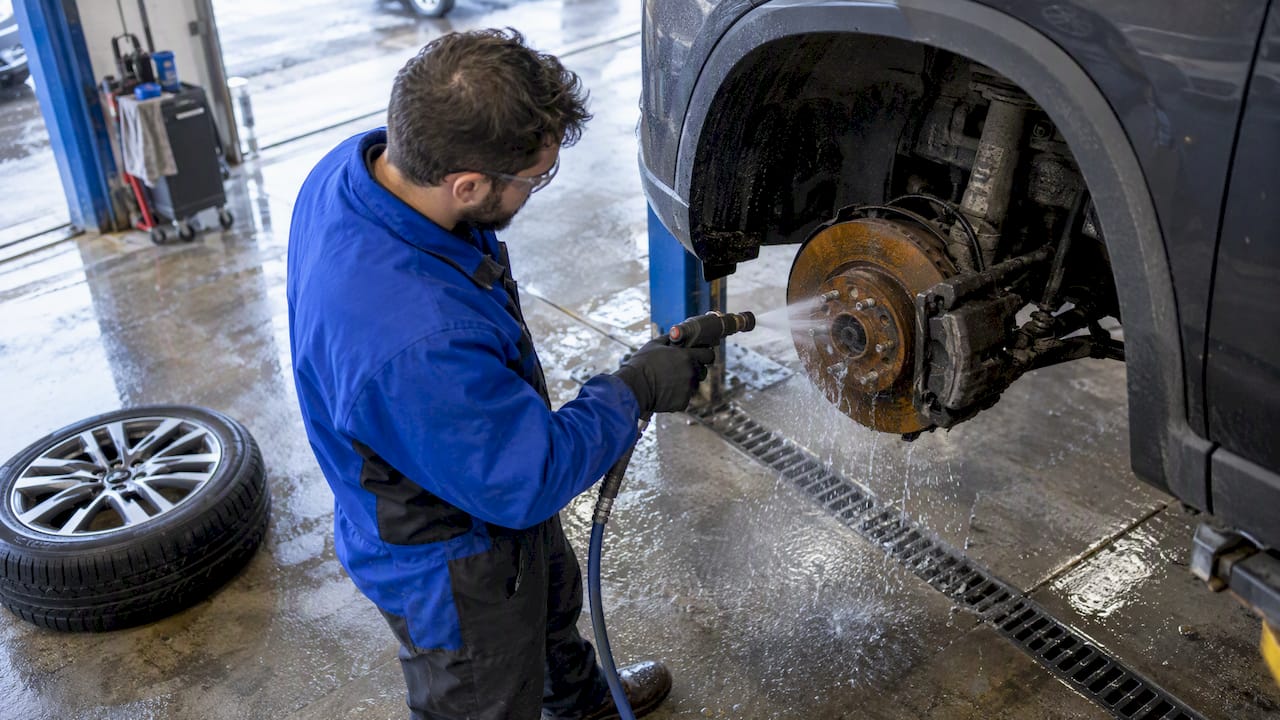
Surface rust on brine-exposed rotors is usually cosmetic, not an emergency. The core risk appears when chloride exposure combines with thickness loss, cracking near the edge, or deep pitting that affects braking, which is condition-dependent under Transport Canada’s brake-system standard. Rinse the wheel wells with low-pressure water, drive gently to clear loose rust, and have a technician measure rotor thickness if anything feels off.
TL;DR:
- Rust on rotors after salt exposure is mostly superficial but prolonged exposure without driving can lead to deep pitting that affects braking safety.
- Corrosion changes braking behavior by disrupting the friction film, reducing effective friction and increasing particle emissions during braking.
- Visual inspection is unreliable; full rotor measurement and crack checking are essential, especially after heavy salt use or if symptoms like judder or squeal appear.
- Rinsing with low-pressure water soon after crossing salted roads, followed by gentle driving, significantly reduces corrosion buildup and pitting risk.
- Coated and corrosion-resistant rotors help, but do not eliminate the need for regular thickness and crack inspections to ensure braking performance and safety.
Table of Contents
- How brine attacks brake rotors and how fast damage can appear
- How corrosion changes braking performance
- Inspection workflow: cosmetic rust versus safety-affecting corrosion
- Prevention and what to do right after brine exposure
- Coatings, rotor materials, and where the research sets realistic limits
- Quick checklist: same-day steps after heavy brine exposure
- Our honest take on coatings and corrosion-resistant rotors
- Parts built for brine-heavy winters
- FAQ
- Sources
How brine attacks brake rotors and how fast damage can appear
Road brine is more aggressive than plain rainwater because it carries chloride ions that break down the thin protective oxide layer that forms naturally on grey cast iron. Once that layer is compromised, the metal underneath corrodes electrochemically, and the process accelerates in the presence of hygroscopic salts like magnesium chloride. According to the Environment and Climate Change Canada code of practice on road salts, magnesium-chloride-based brines draw moisture from the air and keep a rotor surface wet at a microscopic level long after it looks dry to the eye. That extended wetness is what separates brine corrosion from the ordinary flash rust a rotor picks up after a rainy commute.
Timelines vary with temperature, humidity, and how long a vehicle sits between drives:
- Within hours: a thin film of orange flash rust appears on exposed rotor surfaces after brine contact, especially overnight.
- Over days to weeks: repeated exposure without enough driving to burnish it off lets rust thicken and start forming shallow pits.
- Over weeks to months: crevice pitting can deepen along grain boundaries in the cast iron, reaching a point where it affects the friction surface rather than just the hat or vented sections.
- In vehicles with light brake use, corrosion has more time to build before normal pad contact wears it away.
Vehicles that rely heavily on regenerative braking, including many hybrids and EVs, are a special case. Because the friction brakes engage less often, there is less mechanical contact to interrupt corrosion buildup. A study on corrosion-related particle emissions from grey cast iron discs notes that owners of electrified vehicles should check braking surfaces more often after salt exposure, since the lighter brake use that saves wear also means less self-cleaning.
The distinction that matters most is between superficial orange rust and crevice pitting. Surface rust sits on top of the metal and typically wipes or burnishes away within a few stops once the pads re-engage cleanly. Crevice pitting eats into the rotor’s structure, creating small depressions that trap more brine and corrode further, a self-reinforcing cycle that eventually changes how the rotor interacts with the pad.
How corrosion changes braking performance
Braking depends on a thin, constantly renewed transfer film between pad and rotor, not on raw contact between two flat surfaces. That film is built from compacted friction material and oxide particles, and it is what actually determines how much stopping force a given pedal pressure produces. Corrosion disrupts this system because rust and pit debris act as a third body between the pad and rotor, changing the real contact area in ways that are not visible from outside the wheel.

Laboratory work backs this up directly. Research on grey cast iron and titanium-based composites exposed to corrosive salts found that transferred oxide scales behave as abrasives at first, then shift to acting almost like a lubricant as they smear across the surface, producing reduced effective friction that does not fully recover even after burnishing.
A rotor can look fine and still behave differently from a clean one, because the friction film responds to microscopic surface chemistry, not just visible wear patterns. Two rotors with similar mileage and similar colour can deliver noticeably different pedal feel if one carries a history of brine exposure and the other does not.
The oxide scales formed by corrosive salt exposure act first as abrasive particles and later as a lubricating layer, lowering the effective coefficient of friction and altering frictional recovery after burnishing.
This matters beyond pedal feel. A SAE study on corrosion effects on particle emissions recorded at least a 50% rise in PM2.5 and PM10 particle output from a tested grey cast iron disc after 96 hours of aggressive salt-spray exposure, along with a measurable drop in coefficient of friction. These are directional lab results from one test protocol, not a universal number for every rotor on the road, but they confirm that corrosion is not just cosmetic: it changes both how a brake stops a vehicle and how many particles it sheds into the air.
Drivers typically notice this shift through a handful of practical symptoms:
- Poor initial bite on the first few stops after sitting, especially in cold, damp mornings.
- Judder or pulsation through the pedal as uneven corrosion deposits create inconsistent contact.
- Increased brake dust or a faint squeal as oxide particles are ground between the pad and rotor surface.
None of these symptoms alone confirms dangerous corrosion, but together they are a reasonable prompt to have the rotors measured rather than assumed fine.
Inspection workflow: cosmetic rust versus safety-affecting corrosion
Visual colour is the least reliable way to judge a brine-exposed rotor. A rotor coated in light orange rust after a week of road salt can be completely serviceable, while a rotor that looks almost clean can hide pitting deep enough to matter. The only reliable approach combines a wheels-off measurement with a functional check.
- Remove the wheel and inspect the rotor’s full friction surface, not just the visible outer edge.
- Measure rotor thickness with a micrometre at several points around the friction ring, comparing the reading against the manufacturer’s minimum thickness specification. The Ontario vehicle inspection handbook recommends recording these measurements rather than relying on memory or a quick glance.
- Check for cracks, particularly any crack that reaches the outer edge of the rotor, since edge cracks are a direct rejection point regardless of remaining thickness.
- Look for deep pits or grooves that go beyond surface staining into the metal itself, especially in the swept area where the pad makes contact.
- Check lateral runout if the driver reports pedal pulsation, since corrosion can lock caliper slide hardware or build up unevenly in ways that mimic a warped rotor.
- Inspect caliper hardware and slide pins for seizing, since corroded hardware can cause uneven pad contact that accelerates localized rotor wear.
- Check for brake fluid contamination near the caliper, which points to a separate seal issue that needs its own repair.
- Road-test only once the wheel-off checks are clear, watching for pulling, pulsation, or unusual noise under light and moderate braking.
Transport Canada’s brake-system technical standard, TSD No. 135, frames rejection around function rather than appearance: rotors fail inspection for thickness below the specified limit, cracks reaching the edge, or defects that affect braking, not for surface colour on its own. That distinction is worth repeating to any owner who assumes a rusty-looking rotor automatically needs replacement.
Pro Tip: If a rotor pulsates after resurfacing, check lateral runout at the hub mounting surface before assuming the rotor itself is defective. Corroded or seized hardware is a common hidden cause.
Readers who want a closer look at hardware-specific symptoms can see how caliper corrosion develops and what it does to pad contact over time.
Prevention and what to do right after brine exposure
The sequence of actions after a brine-heavy drive matters almost as much as the frequency of exposure itself. A rotor left wet with road brine overnight has far more time to pit than one rinsed and dried within a day.
- Rinse the wheel wells and visible rotor surfaces with a low-pressure hose as soon as practical after driving through heavily salted roads.
- Avoid directing high-pressure water at seals, bearings, or sensor connectors, since forcing water past a seal can introduce the exact moisture problem you are trying to prevent.
- Drive normally and brake lightly a few times once conditions allow, which helps burnish loose surface rust off the friction ring before it has a chance to deepen.
- Avoid aggressive scraping or wire-brushing the friction surface, which can gouge the rotor and create new crevices for brine to collect in.
- Choose rotors with treated, corrosion-resistant hats and non-friction surfaces when replacement is due, pairing them with pad chemistry suited to colder, wetter conditions.
- Keep caliper hardware and fasteners treated against corrosion, since seized slide pins are one of the most common hidden causes of uneven rotor wear after winters with heavy salting.
- Avoid parking for long stretches with wet, brined wheel wells, particularly in unheated garages where hygroscopic salts keep the surface damp.
Pro Tip: A short drive with a few gentle stops right after a brine-heavy commute does more to protect a rotor than weeks of careful parking afterward.
Pad and rotor pairing deserves particular attention here. A pad formulated for dry climates may behave inconsistently on a rotor that has already developed light pitting, while a pad designed around moisture clearing can perform more predictably across the same surface. We cover this relationship, along with how pairing affects winter dust and pitting, in our guide to HydroAdaptive pads and winter brake dust.
Coatings, rotor materials, and where the research sets realistic limits
Coated rotors are marketed heavily for winter driving, and the underlying research supports real benefits, but with qualifiers that matter before anyone assumes a coating removes the need for inspection.
Several coating and deposition methods show up in current rotor engineering:
- HVOF (high-velocity oxygen fuel) coatings apply a dense protective layer, often used where wear resistance alongside corrosion resistance is the priority.
- Cold-spray coatings bond at lower temperatures and show strong resistance across repeated corrosion cycles in lab testing, though they can trade off against wear resistance in heavy use.
- Arc-spray coatings tend to offer better wear characteristics but lower adhesion than cold-spray, according to NRC research on protective coatings for brake rotor discs.
- Duplex coatings, which combine two coating layers, aim to balance adhesion and wear protection, though they carry their own risk of porosity and debonding at the interface.
A particular concern with lightweight rotor designs is galvanic coupling, where dissimilar metals in contact with each other corrode faster than either would alone, especially relevant when aluminum components meet steel or iron parts.
| Coating type | Main protective role | Typical trade-off |
|---|---|---|
| HVOF | Wear and corrosion resistance on dense surfaces | Higher cost, complex application |
| Cold-spray | Strong resistance across corrosion cycles | Lower wear resistance in heavy use |
| Arc-spray | Good wear characteristics | Lower adhesion strength |
| Duplex (two-layer) | Balances adhesion and wear protection | Risk of porosity and debonding |
The test standards behind these comparisons matter too. SAE J2334 and related salt-spray protocols expose samples to conditions like 5% sodium chloride solution at roughly 35°C and high humidity for a set number of hours, often 96-hour cycles. These tests are comparative tools built to rank coatings and materials against each other under controlled conditions, not a direct calendar translation into real-world seasons. A rotor that survives a given number of lab hours does not survive an equivalent number of winters, because field service life depends on pad contact frequency, thermal cycling, and mechanical abrasion that a salt chamber does not reproduce.
The practical takeaway holds regardless of coating choice: a treated rotor reduces the rate of attack but does not eliminate the need for measurement, correct pad pairing, and scheduled inspection. Readers weighing coated against plain rotors for winter driving can see a fuller comparison in our guide to coated versus plain rotors.
Quick checklist: same-day steps after heavy brine exposure
- Rinse wheel wells and visible rotor surfaces with low-pressure water as soon as practical.
- Avoid high-pressure spray near seals, bearings, or sensors during the rinse.
- Check visually through the wheel spokes for heavy rust colour, obvious grooves, or fluid staining near the caliper.
- Drive a short distance with a few gentle brake applications to help burnish light surface rust off the friction ring.
- Book a wheels-off inspection if pulsation, squeal, or pulling appears, or if the vehicle sat wet with brine for more than a day.
- Measure rotor thickness and check for edge cracks during that inspection rather than relying on a visual pass.
- Road-test at light and moderate braking once the wheels-off check clears, and restrict driving only if thickness, cracking, or runout fail the check.
Anyone without the tools or time for the wheels-off steps can find professional inspection through local options such as the brake shop directory for Alberta.
Our honest take on coatings and corrosion-resistant rotors
Treated rotors and moisture-clearing pad technology genuinely help against brine, but they are one layer in a system, not a replacement for inspection. We build pad technology to clear moisture quickly from the friction surface and help keep braking consistent across wet, cold, and humid conditions, pairing that chemistry with treated rotor surfaces in our product lines. That combination addresses the moisture side of corrosion directly.
What it does not do is remove the value of a thickness measurement or a crack check. A rotor can run HydroAdaptive pads and still need replacement if pitting has gone deep enough. Treat coatings and pairing as risk reduction, not a guarantee, and keep the inspection habit regardless of what is bolted to the hub.
— AAA
Parts built for brine-heavy winters
When a rotor has already lost thickness to pitting or a mechanic flags it during inspection, choosing a replacement built for brine exposure is the practical next step. Our SC Type Rotors and GC Type Rotors pair treated, corrosion-resistant surfaces with HydroAdaptive pad chemistry for drivers dealing with salted roads through the cold months.

Parts reduce the rate of attack; they do not remove the need for a periodic check. If you are ready to replace a pitted or thinning rotor, see the full lineup, including Type 07 Brake Pads built for wet and cold climates, on our rotor and pad pages.
FAQ
How do you keep brake rotors from rusting?
Rinse road brine off wheel wells and visible rotor surfaces with low-pressure water as soon as practical, and drive with a few gentle brake applications to burnish off light surface rust. Choosing rotors with treated, corrosion-resistant surfaces and pairing them with moisture-clearing pad chemistry adds a longer-term layer of protection.
Can you fail an inspection for corroded brake discs?
Yes, but the failure depends on function, not colour. Transport Canada’s brake-system standard rejects rotors for thickness below the specified minimum, cracks reaching the outer edge, or defects that affect braking, while light surface rust on its own typically passes.
What causes rotors to go bad quickly?
Repeated exposure to chloride-based road brine without enough driving to burnish the surface clean is the main accelerant, since hygroscopic salts like magnesium chloride keep the surface wet well after it looks dry, according to Environment and Climate Change Canada. Light brake use, long periods of parking, and seized caliper hardware all extend the time corrosion has to build before normal contact wears it away.
Is brake fluid corrosive to metal?
Brake fluid itself is not the primary driver of rotor corrosion, but fluid contamination near a caliper points to a seal problem that needs its own repair during inspection. Rotor corrosion is mainly driven by chloride exposure from road brine acting on the exposed cast iron surface rather than by the fluid inside the hydraulic system.
Sources
- Code of practice for the environmental management of road salts — Environment and Climate Change Canada
- TSD No. 135 — Transport Canada (brake-system standard, 2026 revision)
- The effects of corrosion on particle emissions from a grey cast iron brake disc — SAE paper
- SAE J2334 / related corrosion test guidance — SAE
- Development of protective thermal spray coatings for lightweight Al brake rotor discs — NRC publication