

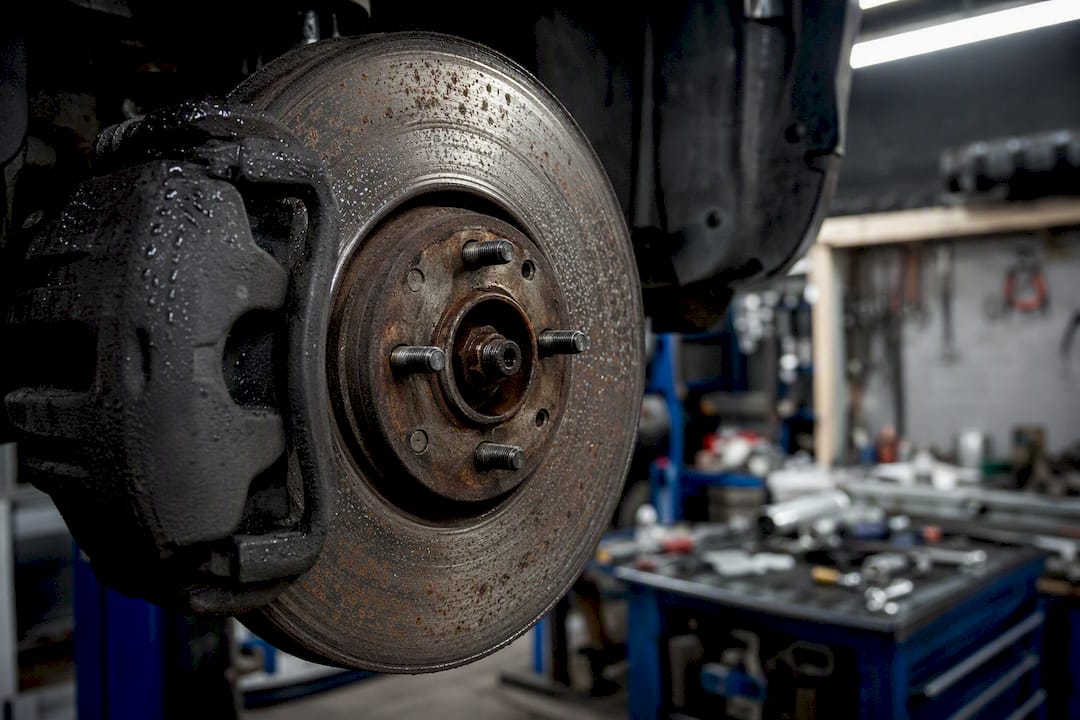
Winter brake dust is normal, but the combination of road salt and moisture makes it stickier and more corrosive than the dust you see in summer. If the buildup looks even across all four wheels, a rinse and a proper cleaning routine will handle it. If one wheel is caked while the others are clean, or the dust showed up suddenly, treat that as a signal to get the brakes inspected before you drive much further.
TL;DR:
- Regular rinsing and targeted cleaning with iron removers are essential for controlling salt-bonded brake dust in winter, especially after heavy salt exposure.
- Asymmetric buildup, unusual noise, or pulling during braking indicates potential mechanical issues requiring inspection before continuing to drive.
- Using low-dust ceramic pads combined with protective coatings can significantly reduce winter brake dust and corrosion, helping maintain pedal feel and wheel appearance.
- Short, frequent cleaning sessions are safer in freezing conditions, with careful attention to runoff, ventilation, and avoiding prolonged contact with chemicals.
- Monitoring rotor surfaces for pitting and being alert to changes in pedal response or vehicle handling helps detect underlying brake system wear caused by winter conditions.
Table of Contents
- What Causes Brake Dust to Get Worse in Winter
- When Winter Brake Dust Signals a Real Problem
- How to Clean Brake Dust Safely in Cold Weather
- Choosing Pads and Protection That Reduce Winter Dust
- Why Moisture Management Matters More Than People Realize
- What Road Salt Actually Does to Your Brakes
- How Winter Driving Wears Down Pads and Rotors
- Cleaning Brake Dust Safely When It’s Freezing Outside
- Your Quick Walkaround Before You Clean or Call a Shop
- Winter-Ready Brake Pads Built for Salt, Slush, and Cold Bite
- Sources
What Causes Brake Dust to Get Worse in Winter
Brake dust is simply worn material shed from your pads and rotors every time you brake. It’s mostly metallic and ceramic fibers, along with resins that hold the pad compound together. On dry summer pavement, that dust mostly blows off or wipes away with a light wash.
Winter changes the chemistry. Road crews spread salt and de-icing chemicals to keep pavement clear, and once that salt mixes with slush and brake dust, it turns into a corrosive paste. That paste sticks and etches clearcoats and accelerates rust instead of just sitting on the surface waiting to be wiped off.
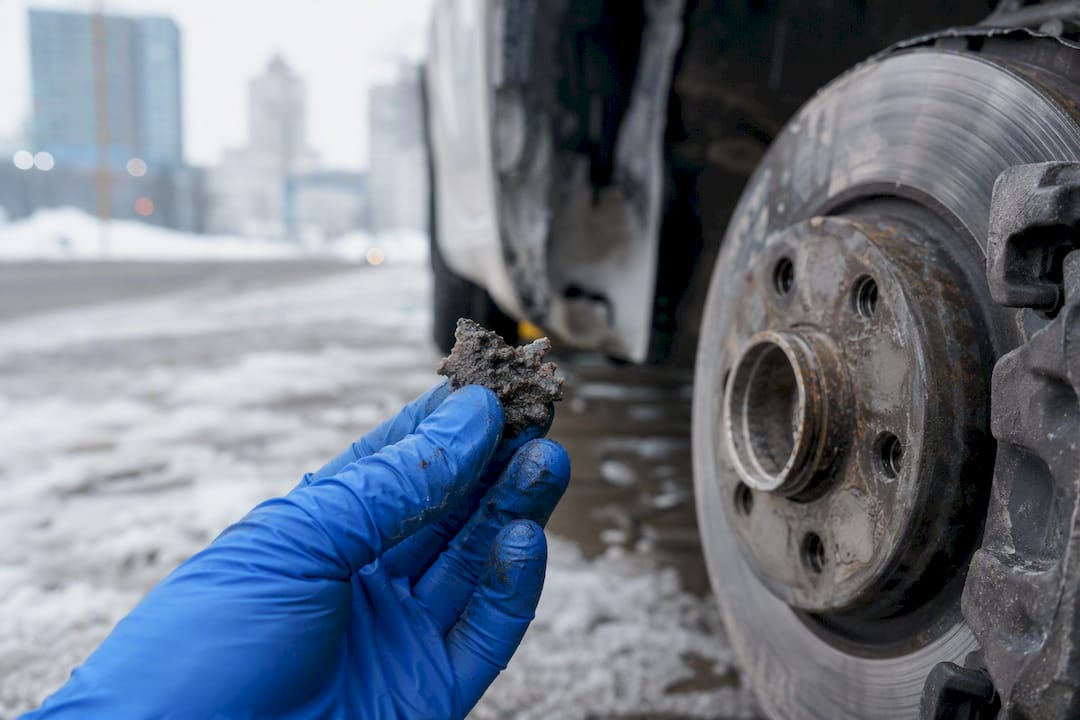
Cold adds a second problem. Rotors that sit wet overnight can develop flash rust, a thin layer of surface corrosion that forms fast in freezing, humid conditions. That rust texture gives dust more to grip, so buildup compounds faster than it would in July.
A few specifics worth knowing:
- Metallic particles in brake dust are abrasive, and combined with grit and salt, they behave like a fine sandpaper against wheel finishes.
- Moisture lowers the temperature at which dust bonds to a wheel’s surface, so it hardens faster in cold weather than warm.
- Repeated freeze-thaw cycles pit rotor surfaces, which gives future dust more texture to cling to.
When Winter Brake Dust Signals a Real Problem
Most of what accumulates on your wheels in January is cosmetic, not dangerous. Left alone for a full winter, though, that dust and salt combination can etch clearcoat, embed iron particles into paint and wheel finishes, and pit rotor surfaces enough to shorten their service life.
The mechanical version of the problem looks different. Heavy dust concentrated on a single wheel, paired with noise, pulling to one side, or a vibration through the pedal, points toward a sticking caliper rather than ordinary wear. Practitioner guidance is consistent on this point: asymmetric dust buildup deserves an inspection appointment, not just a wash.
Pro Tip: Snap a phone photo of each wheel every few weeks. Side-by-side comparisons make it much easier to spot when one wheel starts collecting noticeably more dust than the others.
How to Clean Brake Dust Safely in Cold Weather
Cleaning brake dust in winter takes a bit more sequencing than a summer wash, mostly because you’re fighting bonded salt residue on top of the dust itself. A four-stage approach works best for the buildup that salted roads create.
- Rinse first, always. Hose off loose salt, grit, and slush before any cleaner touches the wheel. Skipping this step just grinds abrasive particles into the finish once you start scrubbing.
- Apply a dedicated iron remover. These products target bonded ferrous contamination that a standard soap can’t touch, and most change color as they react so you can see them working. Avoid harsh acid wheel cleaners on painted or clear-coated finishes; they strip protection faster than they clean.
- Let it dwell, then agitate gently. Give the iron remover time to finish reacting before touching the wheel. Work stubborn pockets with a soft wheel brush rather than scrubbing the whole surface, since dragging grit across a clearcoat is how swirl marks happen.
- Rinse thoroughly and dry. Standing water on a cold wheel refreezes fast, so a full rinse followed by a real dry matters more in January than in July.
- Repeat for heavy buildup. One pass rarely clears a winter’s worth of bonded dust; plan on two rounds if it’s been more than a few weeks since the last cleaning.
On frequency, a light rinse weekly is reasonable if you’re driving on regularly salted roads. A full decontamination wash with an iron remover every two to six weeks, depending on how much salt exposure your commute involves, keeps buildup from becoming permanent staining.
Choosing Pads and Protection That Reduce Winter Dust
The pad compound in your brakes has a direct effect on how much dust you generate and how corrosive that dust becomes once salt gets into it. Ceramic pads generally produce less dust with lower metal content than semi-metallic compounds, which means less iron sitting on your wheels for salt to react with. Semi-metallic pads can offer stronger cold bite in some formulations, but that performance often comes with a dust and corrosion tradeoff that shows up on the wheel face within a season.
Beyond pad choice, a few maintenance habits cut down on winter dust damage:
- Apply a hydrophobic wheel sealant or ceramic coating; these make cleanup faster and reduce how tightly salt and dust bond to the surface.
- Inspect caliper slide pins each season and replace hardware that shows corrosion, since a sticking caliper drives uneven pad wear and asymmetric dust.
- Flush brake fluid if you suspect moisture contamination, since absorbed moisture lowers the fluid’s boiling point and can produce a soft or sinking pedal.
- Check rotor surfaces periodically for pitting, since a pitted rotor accelerates future dust buildup even after cleaning.
No pad compound eliminates dust entirely. Switching to a lower-dust friction material helps, but it works best paired with a cleaning routine and a protective coating, not as a standalone fix.
Why Moisture Management Matters More Than People Realize
Most winter brake advice focuses on salt and cold, but moisture is the variable that ties both together. Water is what carries salt into the pad-rotor interface, and water is what turns surface rust into pitting over a season of freeze-thaw cycles. Aaafrictions built its HydroAdaptive ceramic technology around that exact problem: clearing moisture from the friction surface quickly so dust and salt residue have less opportunity to bond before the next stop.
Corrosion-resistant rotors paired with a climate-adaptive pad compound limit how much iron gets embedded into wheel finishes over a winter, which is the mechanism behind most of the pitting and clearcoat etching drivers deal with by spring. The goal isn’t a dust-free wheel. It’s a braking system that keeps working the same way whether the road is dry pavement or slush, and that doesn’t leave you with a corroded rotor surface come April.
Consistent pedal feel across wet, cold, and dry conditions is the real test of a winter brake system. Dust reduction is a side benefit of getting the moisture management right.
What Road Salt Actually Does to Your Brakes
Salt and de-icing chemicals don’t just make dust harder to wash off. They change the chemistry of everything they touch on your undercarriage. Sodium chloride and calcium chloride, the two most common de-icers, are both highly conductive and corrosive once dissolved in slush or standing water.
When that solution mixes with brake dust already sitting on a wheel, it forms a paste that stays wet far longer than plain water would, since salt lowers the freezing point of the mixture. That extended wet period is exactly when iron particles have the most time to bond with paint and clear coat. It’s also when rotor surfaces exposed to the same runoff develop the flash rust that shows up as an orange haze after a car sits overnight.
Removal gets harder the longer that paste sits. A quick rinse a day or two after a salt application lifts most of it away easily. Left for weeks, the same residue requires a dedicated iron remover and some agitation to break the bond. This is part of why weekly rinses matter more in regions that salt heavily than in places that use sand or gravel for traction instead.
De-icing chemicals also accelerate wear on rubber components like caliper boots and slide pin seals, which is a separate but related reason winter brake systems need more frequent hardware checks than summer ones.
How Winter Driving Wears Down Pads and Rotors
Cold weather changes braking mechanics in ways that go beyond dust and corrosion. Pad compounds behave differently at low temperatures. Some semi-metallic formulations need more heat to reach peak friction, which means a driver might press harder or brake longer to get the same stopping power on a cold morning, generating more wear material in the process.
Stop-and-go winter driving, common in snow and slush, also means more total brake applications per trip compared to steady highway driving. More applications translate directly into more dust generated, independent of pad compound. Add in the abrasive grit that road crews spread for traction, and you get a wear environment that’s harsher on both pads and rotors than dry summer pavement.
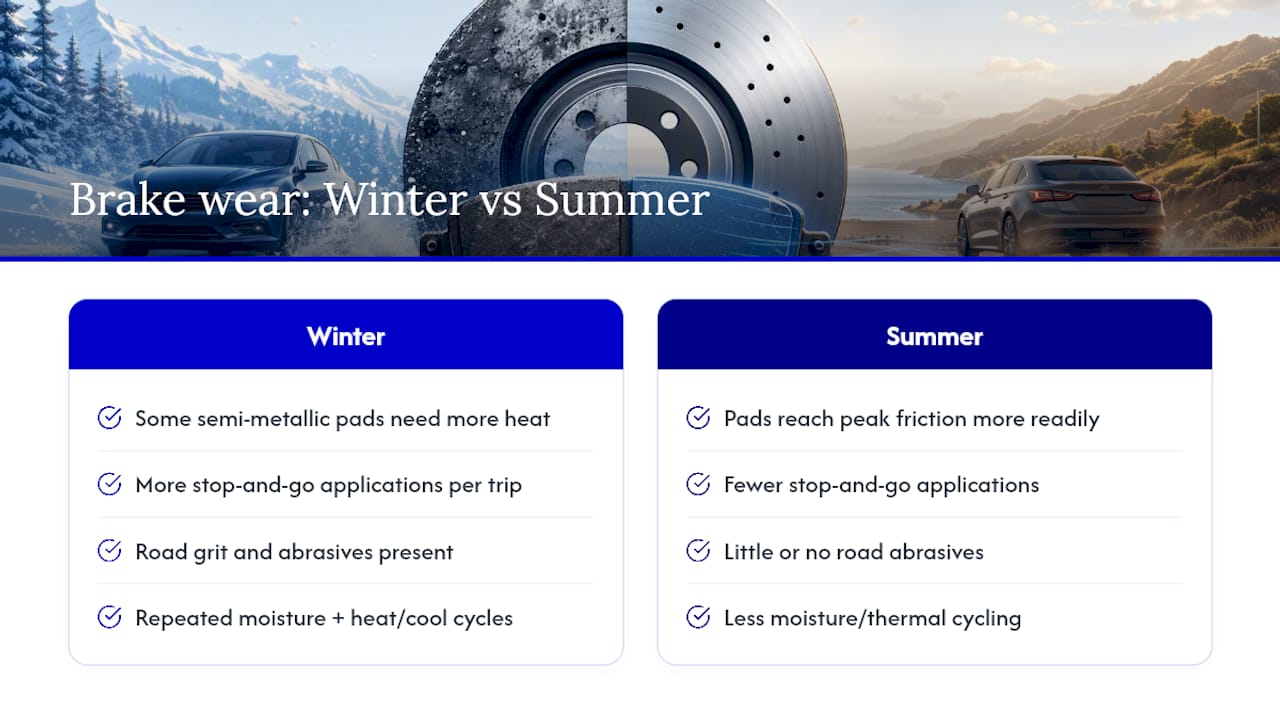
Rotors take a specific kind of damage from this cycle. Repeated exposure to moisture, followed by rapid heating during braking, followed by cooling again in cold air, stresses the rotor surface. Over multiple seasons, that stress shows up as pitting, which in turn roughens the surface that pad material rides against. Once a rotor is pitted, it wears the pad faster and produces more dust than a smooth rotor would, creating a cycle that gets worse each winter unless the rotors are addressed.
Cleaning Brake Dust Safely When It’s Freezing Outside
Winter wheel cleaning comes with hazards that don’t exist in warmer months. Standing water near your driveway or garage refreezes into a slip hazard within minutes if the temperature is below freezing, so plan your rinse water flow away from walkways and entry points before you start.
Work in short sessions if you’re outside in genuinely cold temperatures. Wet gloves and cold metal wheels are a fast route to numb fingers, and rushed cleaning tends to skip the rinse step that prevents grit from scratching the finish. A pair of nitrile gloves under insulated outer gloves keeps skin protected from both cold and the chemicals in iron removers, several of which can irritate bare skin during extended contact.
Ventilation matters even outdoors. Iron removers release a noticeable sulfur smell as they react with contamination, and that smell is stronger in cold, still air than on a breezy summer day. Working upwind of the wheel you’re cleaning keeps the fumes away from your face.
If you’re using a heated garage, watch for the runoff carrying salt and cleaning chemicals toward a floor drain rather than pooling. Salt residue tracked back into a warm space can corrode tools and equipment left nearby just as readily as it corrodes a rotor outside.
Your Quick Walkaround Before You Clean or Call a Shop
Before you spend a Saturday scrubbing wheels, walk around the car and check for uneven dust distribution, heavy buildup concentrated on one wheel, or visible pitting on a rotor surface through the spokes. Take it for a short drive and pay attention to pedal feel. A soft or sinking pedal, pulling to one side, or a scraping and grinding noise are all signs pointing toward mechanical wear rather than ordinary winter grime.
If you spot sudden, asymmetric dust or any of those driving symptoms, stop and get the brakes inspected before doing more miles. Everything else on this list is safe to address with a wash and a follow-up check next month.
— AAA
Winter-Ready Brake Pads Built for Salt, Slush, and Cold Bite
If your winters mean weekly wheel scrubbing and rotors that show rust every time the temperature drops, the pad and rotor combination on your car might be working against you. Aaafrictions builds its pads and rotor kits around HydroAdaptive ceramic technology specifically to reduce that fight, clearing moisture from the friction surface fast enough that salt and dust have less chance to bond before your next stop.

A HydroAdaptive+ ceramic pad and GEOMET coated rotor kit pairs lower dust output with corrosion-resistant rotor coating, which means less iron embedding into your wheel finish and fewer flash rust surprises after a cold, wet night. That combination doesn’t just cut down on cleaning time. It keeps pedal feel consistent whether you’re braking on dry pavement or slush, which is the part that actually matters when conditions turn. Use the vehicle-fit lookup to find the kit built for your specific make and model, and check the HydroAdaptive technology page if you want the engineering detail behind how the moisture clearing works before you order.
Sources
- Is Brake Dust A Problem Or Just Normal? – Joes All Tire
- Winter brake maintenance: what parts to inspect and replace – NAPA Canada Blog
- Effective winter wheel cleaning | Remove salt & brake dust – Squid Ink Detailing
- Ceramic vs Semi-Metallic Brake Pads: Which Should You Choose? – AutoZone
- Finding a Cure for Brake Dust – MotorWeek
Recommended
- Front and Rear Brake Kit for Honda Pilot 2003-2008, Type 07 HydroAdaptive+ Ceramic Disc Brake Pad and Rotor Set with GC Type GEOMET Coated Rotors
- Front and Rear Brake Kit for Ford Edge 2011-2014, Type 07 HydroAdaptive+ Ceramic Disc Brake Pad and Rotor Set with GC Type GEOMET Coated Rotors
- Front and Rear Brake Kit for Acura MDX 2014-2016, Type 07 HydroAdaptive+ Ceramic Disc Brake Pad and Rotor Set with GC Type GEOMET Coated Rotors
- Front and Rear Brake Kit for Nissan TITAN 2017-2024, Type 07 HydroAdaptive+ Ceramic Disc Brake Pad and Rotor Set with GC Type GEOMET Coated Rotors