

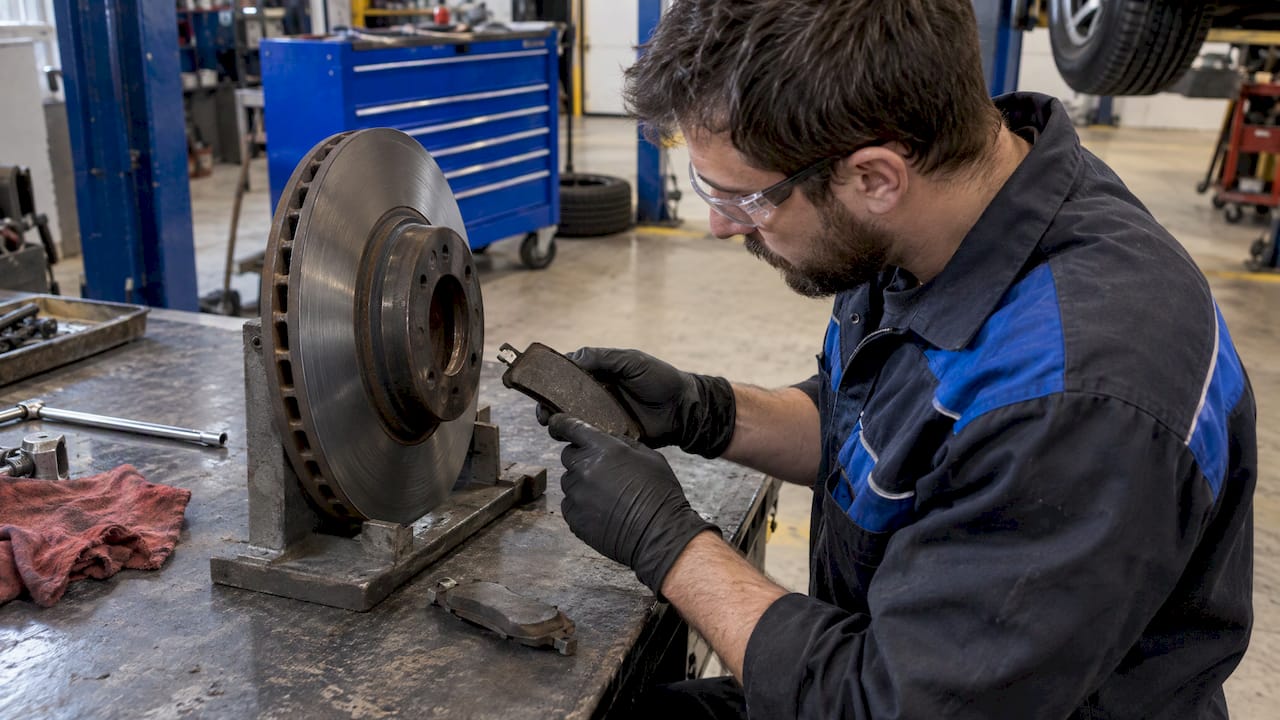
There is no single direction that suits every car. On most floating-caliper vehicles the pad with the wear indicator goes on the inboard side, against the caliper piston. Whether the tab sits at the top, bottom, leading edge or trailing edge depends on your vehicle’s design, and the service information for your exact model decides it. The sections below show how to identify the right pad, read its markings, and fit the indicator so it warns you when it should. They also explain why a matched pad set makes the job simpler.
TL;DR
- On many floating-caliper vehicles, the pad that carries the wear indicator is the inner pad, the one on the piston side of the rotor.
- Up or down is not universal. One manufacturer manual calls for the indicator at the top of the pad, another for a plate facing upward, and another for a plate facing downward. Always follow the instructions for your vehicle.
- Read the markings on the backing plate (IN, OUT, L, R, UP, arrows) before you remove the old pads, and photograph how they sat.
- Electronic sensors need the correct depth, correct wire routing and a reset of the service indicator where the vehicle has one.
- Fitting the indicator the wrong way can leave you without a warning or cause noise and rotor scoring.
Table of Contents
- What a wear indicator does
- Which pad carries the indicator
- Which way should the indicator face
- How to read the pad before you take it off
- Installing a mechanical wear tab correctly
- Electronic wear sensors
- What goes wrong when the indicator is wrong
- A worked example: a front brake job on a typical sedan
- Perspective: why a matched system makes the job cleaner
- Choosing pads for your vehicle
- Get the right set for your car
- FAQ
- Sources
What a wear indicator does
A mechanical wear indicator is a small metal tab built into the pad. As the friction material thins, the tab reaches the rotor and scrapes it, which produces a chirp, squeal or whistle. GMC Canada describes these tabs as rubbing the rotor once the pads wear to the point where they are revealed, signalling that it is time to have the brakes checked.
The tab only works if it sits where it can meet the rotor at the right moment. That is the whole reason direction matters. A tab on the wrong pad, or facing the wrong way, may touch the rotor too early, too late or not at all.
Some vehicles use an electronic sensor instead. It is a small wire loop embedded in the pad. When the friction material wears down to the loop, the circuit breaks and a dashboard light comes on. Transport Canada’s Technical Standard on Light Vehicle Brake Systems requires that the wear condition of service brakes be shown either by an acoustic or optical warning to the driver, or by a way to check lining wear visually from outside or underneath the vehicle with normally supplied tools. Wheel removal is allowed for that check. So the indicator is a required safety feature in Canada, not an optional extra.
Which pad carries the indicator
On most passenger cars with a floating caliper, the answer is the inner pad. A floating caliper has a piston on the inboard side only. The piston pushes the inner pad against the rotor, and the caliper body slides to pull the outer pad into the other face. That design tends to make the inner pad wear faster, which is why it is the sensible place for a warning device. Brake & Front End explains that most basic electronic wear systems mount the sensor on the inboard pad for that reason.

Manufacturers write the same rule into their service documents. A Toyota service bulletin on front brake squeal for recent Land Cruiser and 4Runner models states that the pad with the wear indicator is the inner pad and the pad without it is the outer pad. It also tells installers to match pad orientation using the identification stamped on the backing plate. The Mitsubishi Eclipse Cross service manual likewise says to install the pad with the wear indicator on the inner side of the brake disc.
Why the inner-pad rule is a pattern, not a law
The inner-pad pattern is common, but it is not a universal rule. Some applications place a mechanical sensor on the outboard pad, and heavy vehicles have their own arrangements. A New Flyer bus service bulletin, for example, puts the longer end of the sensor harness in the outboard pad. Your vehicle’s own pad position is what counts. If your service information and the common pattern disagree, follow the service information.
Which way should the indicator face
This is the part most people searching this keyword want settled, and the honest answer is that manufacturers differ. Three examples show it:
- The Mitsubishi manual above calls for the indicator at the top of the pad.
- A technician feature on the 2004 to 2008 Toyota Corolla brake job instructs the installer to fit the wear indicator plate facing upward.
- A Toyota Sequoia service manual of the same era specifies an inner pad with the plate facing downward.
These are three different vehicles with three different instructions, and each is correct for its own car. The correct edge depends on the caliper design, the pad shape, the direction the rotor turns and how the indicator was engineered to contact the disc. If someone online tells you the tab “always goes on the leading edge” or “always at the top”, treat that as a habit from one car, not a rule for yours.
Rotor rotation and the tab
Rotor direction can matter too. Some pads have a leading and trailing edge, and the tab is placed to suit the way the rotor turns past the pad. Some rotors are also directional, with curved vanes built to pump air in a set direction. If your car has them, read our guide on checking vane lean to fit directional rotors before you fit the new set, so the pad and rotor orientation both come out right.
How to read the pad before you take it off
You do not need to guess. Most of the answers are on the old pads and the caliper in front of you.
- Photograph everything first. Before removing a single bolt, photograph each wheel’s caliper, pad positions, clips and springs from two angles. Do one axle at a time so the other side stays as a reference.
- Look for backing-plate markings. Pads are often stamped IN, OUT, L, R or UP, sometimes with an arrow. L and R refer to the left and right of the vehicle as you sit in the driver’s seat. An arrow usually shows the direction the rotor turns when the car moves forward.
- Identify the inner pad. The inner pad usually has a clip or spring that snaps into the caliper piston, and a backing plate shaped to match the piston side. The outer pad typically lacks that clip and may have tension ears that hold it in the caliper bracket.
- Note where the tab or sensor sits. Look at which pad has the tab or sensor slot, and which edge it is on. Match the new pad to the old.
- Compare old and new side by side. Hold the old and new pads together. The tab, the shape and the shim positions should line up. If they do not, stop and check the part number against your vehicle.
One rule applies throughout: never bend a wear tab to make a guessed arrangement fit. A bent tab can sit in the wrong spot and either drag on the rotor or never reach it.
Installing a mechanical wear tab correctly
A mechanical tab should sit clear of the rotor while the pad has material left. It should move freely and not rub the caliper or the rotor face until the pad is near its wear limit. If it drags from the first day, you will hear a constant light scraping and you may score the rotor.
A short checklist at fitting:
- Fit the tab pad in the position your service information gives, usually inboard.
- Orient the tab as the old pad had it, or as the vehicle’s instructions show.
- Make sure the pad slides freely in the bracket, and that anti-rattle clips and shims are seated. Our guide to brake pad shims explains what they do and why they should go back on.
- Spin the wheel by hand after reassembly and listen for scraping before you lower the vehicle.
The warning sounds themselves are easy to confuse with other noises. This overview of brake noises and wear describes the sound a mechanical indicator makes when it contacts the rotor. New pads can also squeak for harmless reasons during bedding, which we cover in how to tell bedding noise from real failures.
Electronic wear sensors
If your vehicle has a dashboard brake warning, it likely uses an electronic sensor. Two details matter at installation.
First, depth and placement. The sensor’s exposed loop must sit at the depth the pad maker engineered, in the position the vehicle specifies. Fitted in the wrong spot, it either triggers late or warns too soon.
Second, wiring. Route the lead through every factory clip so it cannot chafe or sit against a hot surface, and push the connector in until it locks. In the New Flyer bulletin, installers insert the cable into each pad’s groove so the indicators snap into the holes, and the cable is replaced when wear is detected or pads are renewed. Cars differ, but the principle is the same: sensor, clips and connector go back as the factory arranged them. If you want to see where wear sensors sit on a vehicle, locating the sensor connector near the wheel is the starting point.

Some newer systems are more sophisticated than a single wire loop. Brake & Front End reports that two-stage sensors use two resistor circuits at different depths and can estimate remaining pad life. Those systems typically need the brake life service indicator reset after the pads are replaced, so check your owner’s manual for the reset procedure.
What goes wrong when the indicator is wrong
- No warning when you need it. If the tab or sensor is on the wrong pad or cannot reach the rotor as the pad wears, you lose the early signal. The first sign becomes a grinding noise or a longer stopping distance.
- Early or constant noise. A tab touching the rotor too soon will squeal or scrape long before the pad is worn out.
- Rotor scoring. A tab that drags leaves a groove in the rotor face. Our guide to worn brake pad signs and rotor damage shows what that damage looks like.
- Sticking pads. A bent tab or a poorly seated clip can stop the pad moving freely in the bracket.
None of this is difficult to avoid. It takes ten minutes of looking before you start and the vehicle’s own instructions.
A worked example: a front brake job on a typical sedan
Say you drive a front-wheel-drive sedan with floating front calipers and a single mechanical tab on the front pads. You lift the front, remove the wheel and see the caliper. You photograph it, then undo the caliper bolts and hang the caliper from the spring or a wire so the hose carries no weight.
The old inner pad has a clip in the middle of its backing plate, and a metal tab at one end near the rotor face. The outer pad is plain. You lay the new pads beside the old ones. The new inner pad has the same clip and tab position, so it goes in the inner slot with the tab oriented as before. You then check the owner’s or service manual for the tab position, because on some models it is at the top and on others at the bottom. Everything agrees, so you seat the pads, refit the shims and clips and torque the caliper bolts to the specified value.
The same job on a pickup or SUV can differ in tab position, and on a car with electronic sensors you also route and connect the lead. The routine is identical: observe, match, confirm against the vehicle’s documentation, then fit.
Perspective: why a matched system makes the job cleaner
We build our brake parts around the idea that pads and rotors work best as a pair. Our rotors are only sold with compatible pads, because the friction profile of the pad and the surface of the rotor are developed together as a matched system.
That matters at installation too. When pad and rotor come from one engineered set, you are not guessing whether a pad’s shape, shims and wear tab suit the rotor and caliper they will work with. You compare the new pad against the old one, confirm orientation against your vehicle’s information, and you are done.
Our range is built for changing weather: HydroAdaptive pads for moisture management and stable friction, GEOMET-coated rotors for protection against corrosion from moisture and road salt, and ClimateFlex calipers for smooth operation through winter cold and summer heat. A brake that stays consistent in rain, slush and freezing mornings is a brake whose wear you can read clearly, and a correctly fitted indicator is part of that picture.
For Canadian drivers, that means thinking about the whole season. Our winter brake checks guide goes through the inspections worth doing before the cold arrives.
AAA
Choosing pads for your vehicle
Wear indicator position is one reason to buy pads for your exact make, model and year rather than a generic fit. Our Type 03 and Type 07 brake pads are vehicle-specific, and our SC Type and GC Type rotors are sold with compatible pads so the set works as designed. If you drive a Ford, you can browse Ford brake pads and rotors by model. If you want to understand an edge detail that affects noise and bedding, see our explainer on chamfered brake pads.
If you are a daily commuter, a rideshare or delivery driver or you cover high mileage, you will go through pads faster than most. A clear wear warning and a clean installation matter more the more you drive.
Get the right set for your car
Start with the pad range that matches your vehicle. Our Type 03 brake pads and Type 07 brake pads use HydroAdaptive ceramic technology for stable braking in rain, humidity, snow and cold. If you are replacing rotors as well, our SC Type rotors and GC Type rotors are developed as a system with our pads.

Select your vehicle on the product page, compare the new pads against your old set when they arrive, and confirm the wear indicator position against your vehicle’s service information before you fit.
FAQ
Which brake pad does the squealer go on?
On most floating-caliper vehicles it goes on the inner pad, the one the caliper piston pushes. Manufacturer service documents such as Toyota’s squeal bulletin state this directly. Some applications differ, so confirm against your vehicle’s service information.
Does the wear indicator go on the top or the bottom of the pad?
It depends on the vehicle. One manufacturer manual calls for the indicator at the top of the pad, a Corolla procedure calls for the plate facing up, and a Sequoia manual calls for it facing down. Match the position the old pad had and your vehicle’s instructions.
Does it matter whether the pad is on the left or the right?
Often it does. Pads can be stamped L or R, meaning left or right as seen from the driver’s seat, and arrows usually show the forward direction of rotor rotation. Follow those markings so each pad ends up on the side it was made for.
Do I have to reset anything after fitting new pads with an electronic sensor?
On many vehicles, yes. A brake life service indicator on the dashboard usually has to be reset after the pads are replaced. Your owner’s manual gives the procedure for your model.
What should I do if the indicator is already making noise?
A chirp or squeal from a mechanical indicator is a signal that the pads are worn and the brakes need attention soon. Have the pads, rotors and calipers inspected promptly and replace the pads before they wear further.
Sources
- Mitsubishi Eclipse Cross service manual, brake pad installation
- Toyota service bulletin MC-11036129, front brake squeal
- Brake & Front End, Electric Brake Pad Wear Sensors
- UnderhoodService, Brake Job on 2004-2008 Toyota Corolla
- Transport Canada, Technical Standard on Light Vehicle Brake Systems
- GMC Canada, About the Brake System
- New Flyer service bulletin SMB-151
- How to tell if you need new brakes, from noise to wear
- Where wear sensors sit on your car